 Back To How To Fix A Cracked Turtle
More Complex Turtle / Tortoise Shell Repair Procedures
Ron Hines DVM PhD
Major shell defects always require your ingenuity when it comes to repairing them. Despite your best efforts, quite a few of these turtles and tortoises do not survive. That is not because of infections. Chelonians (turtles & tortoises) and other poikilotherms (cold-blooded animals) are highly resistant to infection unless they are kept at low temperatures. Cold-blooded animals rely primarily on their extremely strong innate immune system to protect them from infections. (read here) At low temperatures their immune system functions poorly and can even shut down. (read here) Warm-blooded animals rely more on their adaptive immune system.
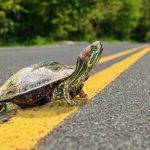
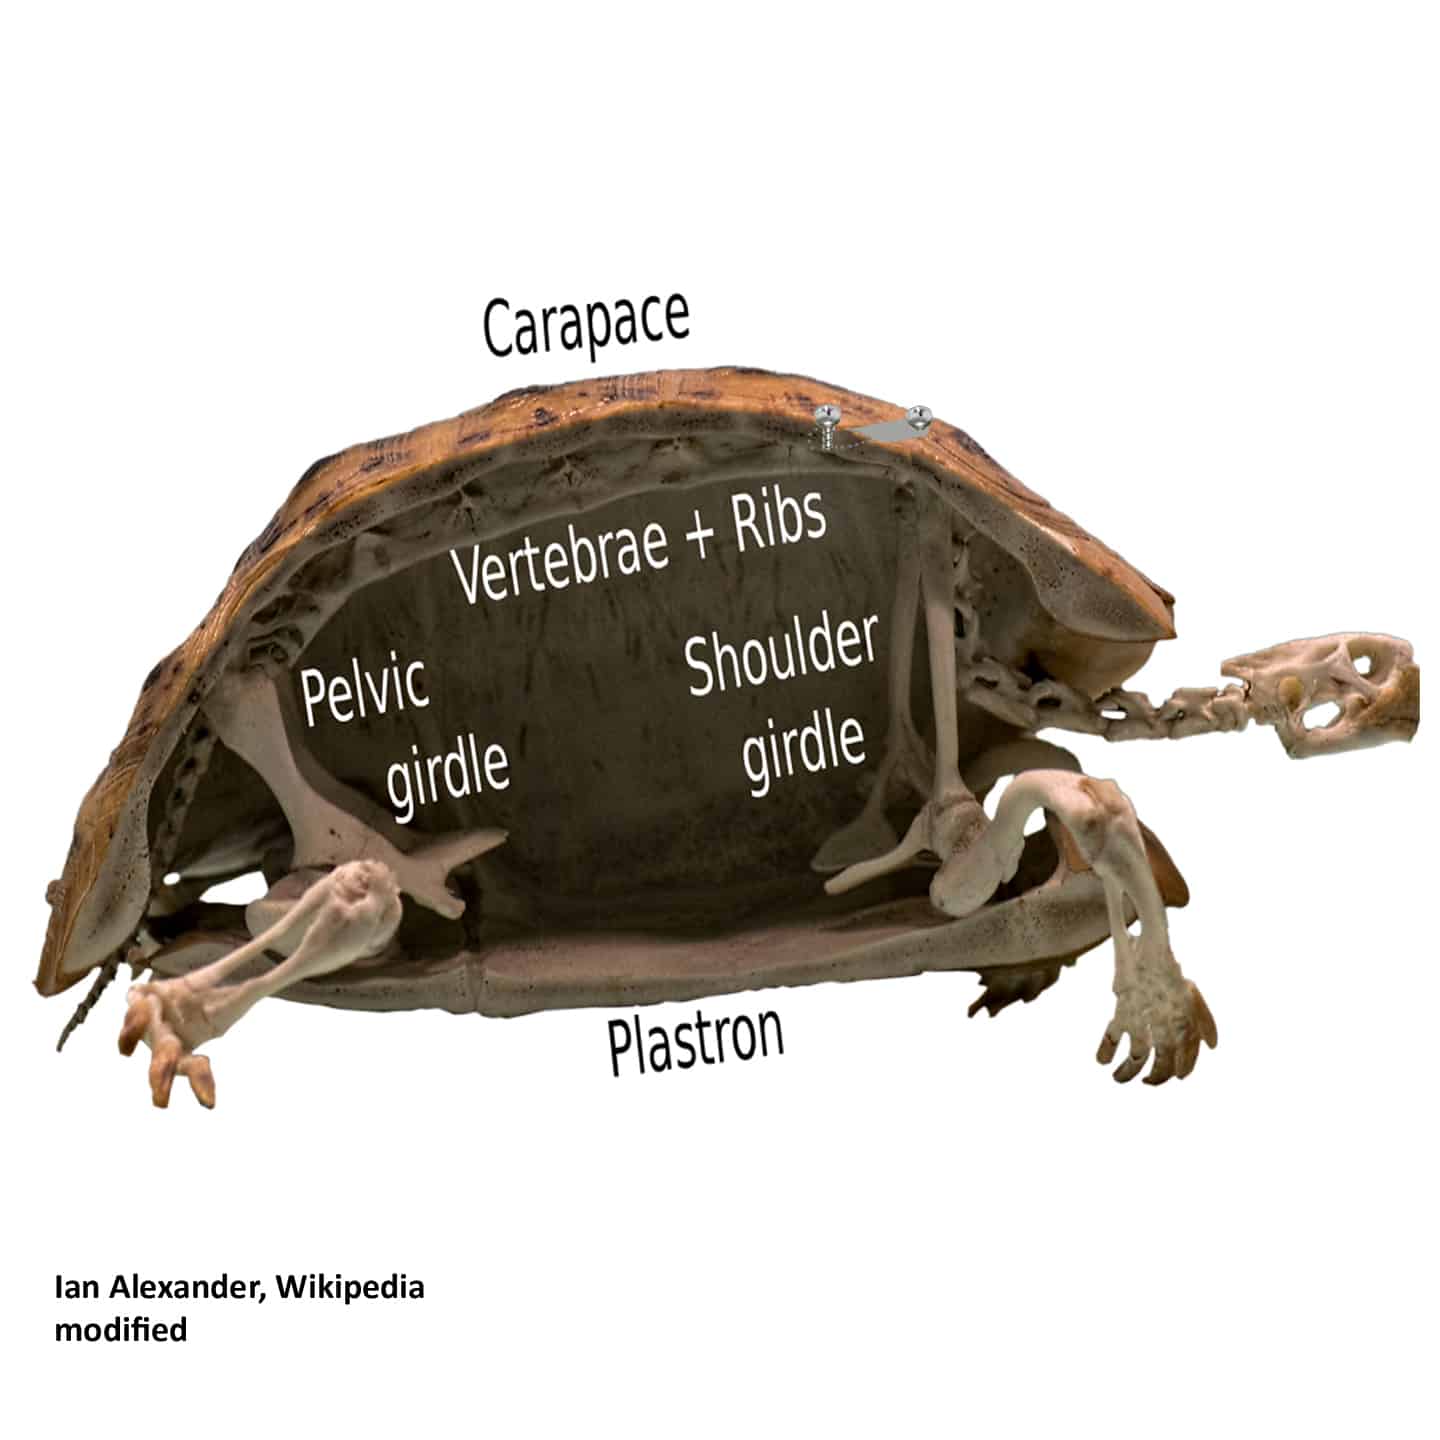
Highway runovers are the most common reasons turtles and tortoises are brought to wildlife rehabilitation centers for care. The cracked shells are often striking. But it is the internal organ damage in these creatures accompanies automobile trauma that is the most life-threatening. That damage is often unapparent. Often, run over turtles and tortoises shells spring back to close to their normal positions after having been crushed. So internal damage is not readily apparent. That internal damage is most likely to occur when tires pass over the center of their convex carapace (upper shell). When a tire passes over the rear or to either side, turtles are generally “spit out” from under the tire laterally, without as intense crushing force. Of course, the weight of the vehicle that passed over them is a very important factor as well. That is why shell repair techniques like the ones in these photos are not always successful.
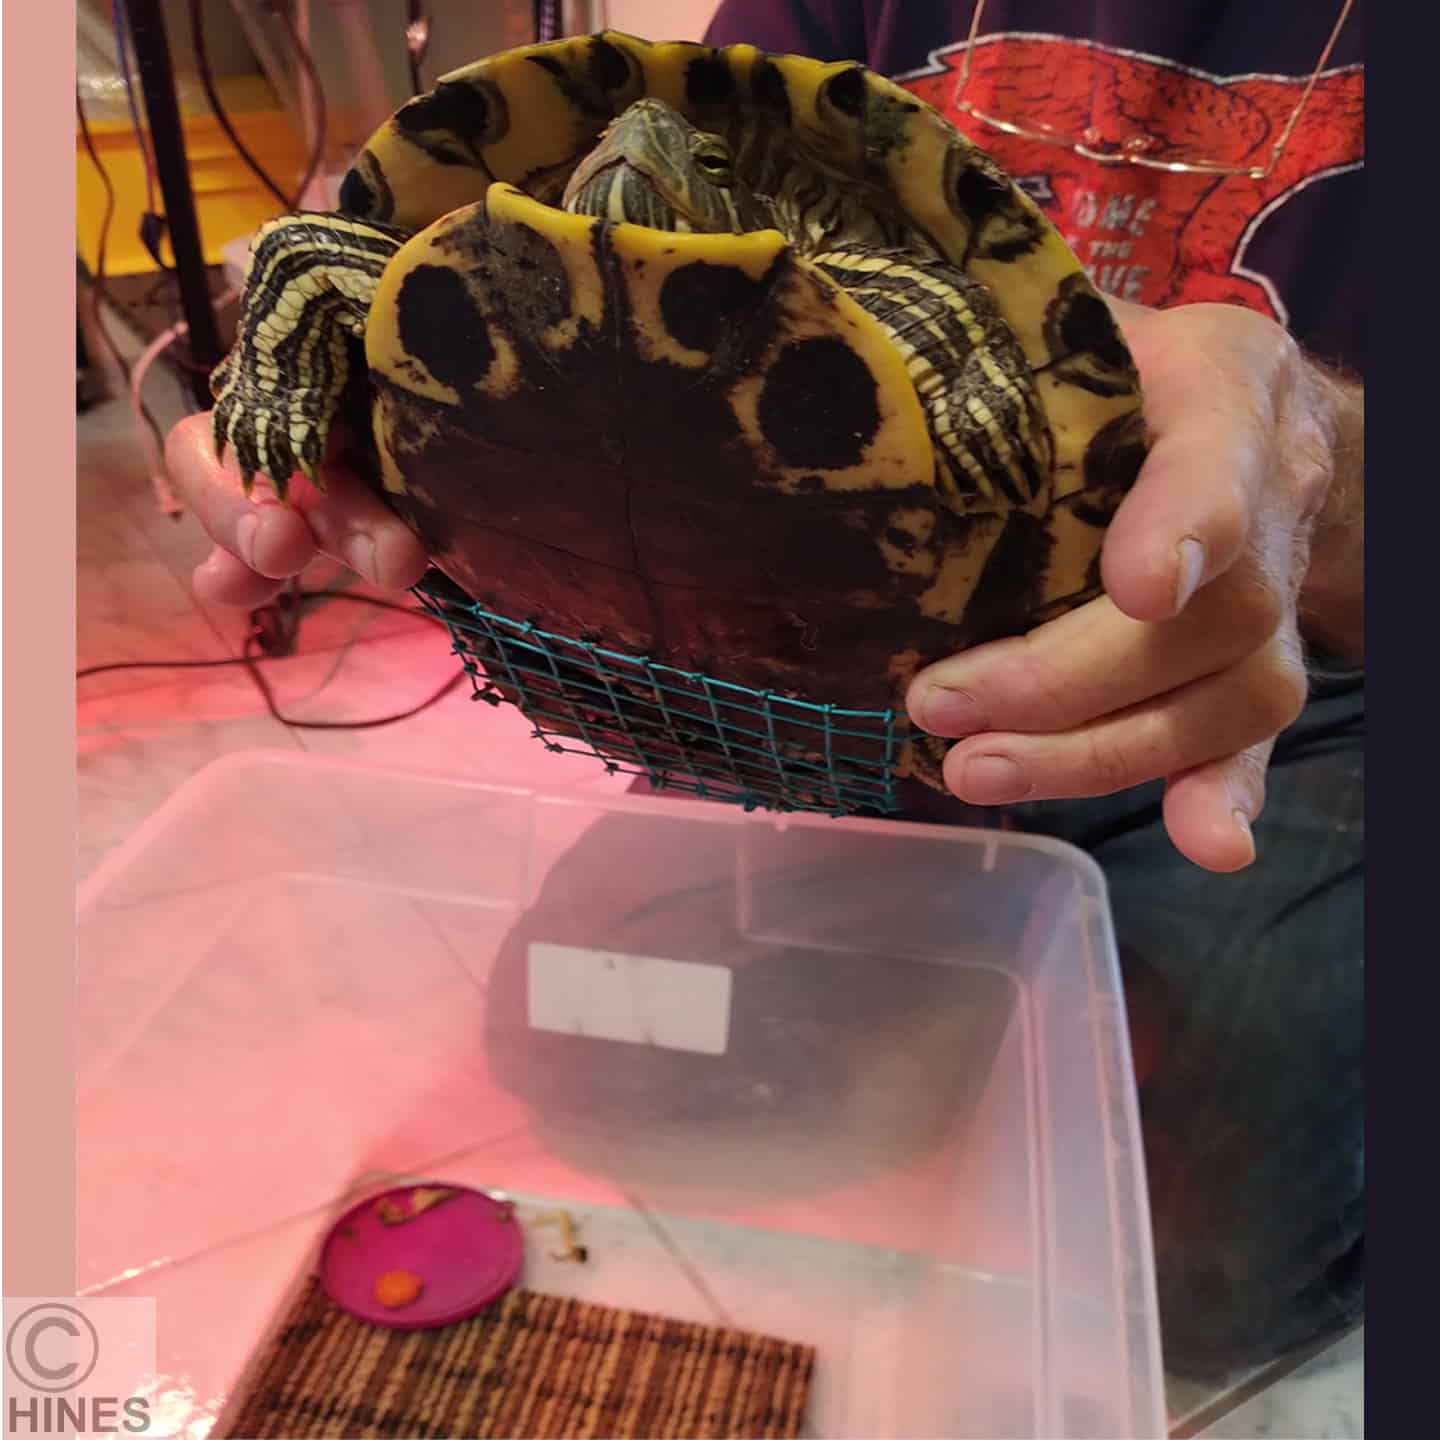
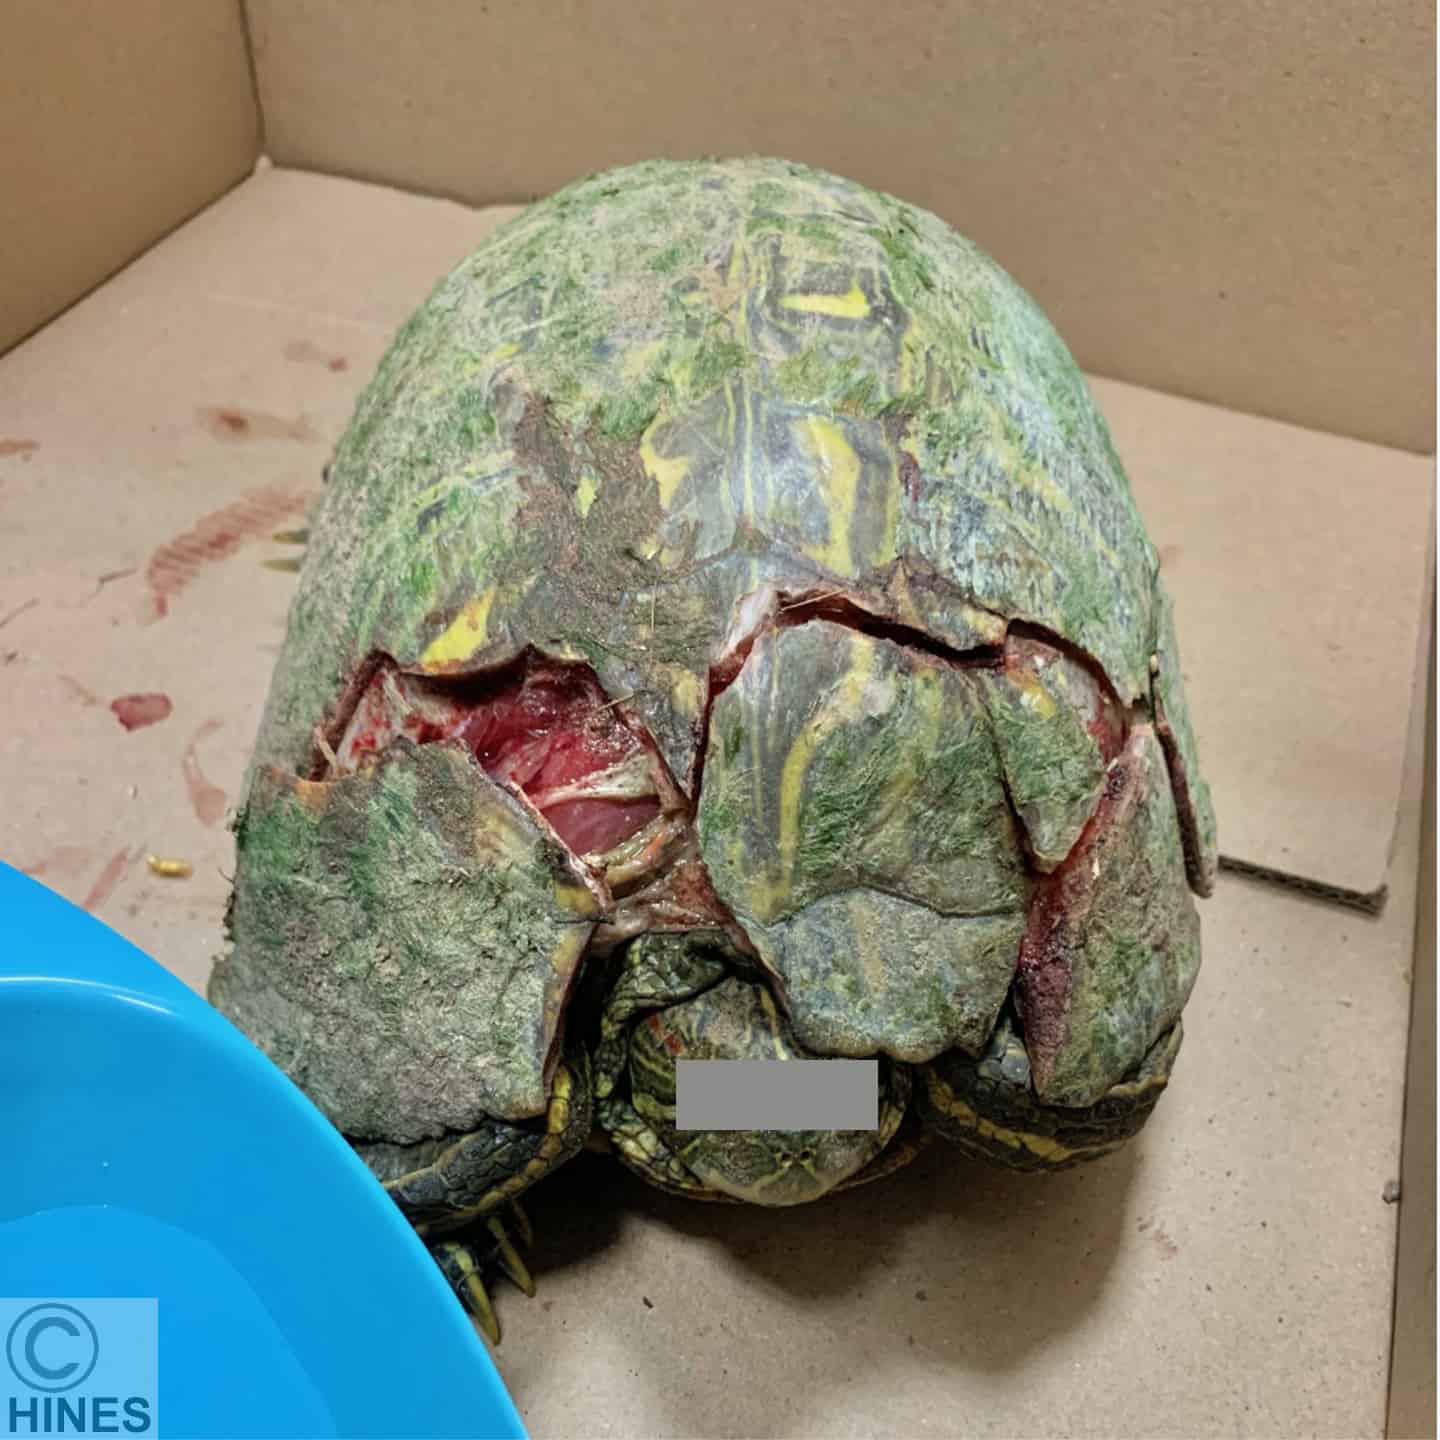
The red-eared slider in these first photos weighted 3.7 lbs/ 1678 grams when admitted. It is always wise to weigh turtles when they arrive and frequently again during treatment to be sure that they are maintaining their weight. Turtles and other wildlife that begin to “go light” rarely if ever recover. One always needs to be hygienic when dealing with rehab turtles. Stress is known to reactivate dormant salmonella bacteria lurking within their digestive tracts which then contaminating the water surrounding them. (ask me for DuPonte1978)
I try to keep recovering turtles and tortoises at about 77 F / 25 C which has the potential to speed their healing. Lower temperatures encourage low metabolism (brumation) during which time all body processes, including healing, slow down. I feed them a diet with at least 35% protein, which I hope encourages shell repair. Too long a period on a high-protein diet can cause shell abnormalities, a condition called pyramiding or peaking. A full spectrum light source is also very important during long recuperation if the animal will be kept indoors.
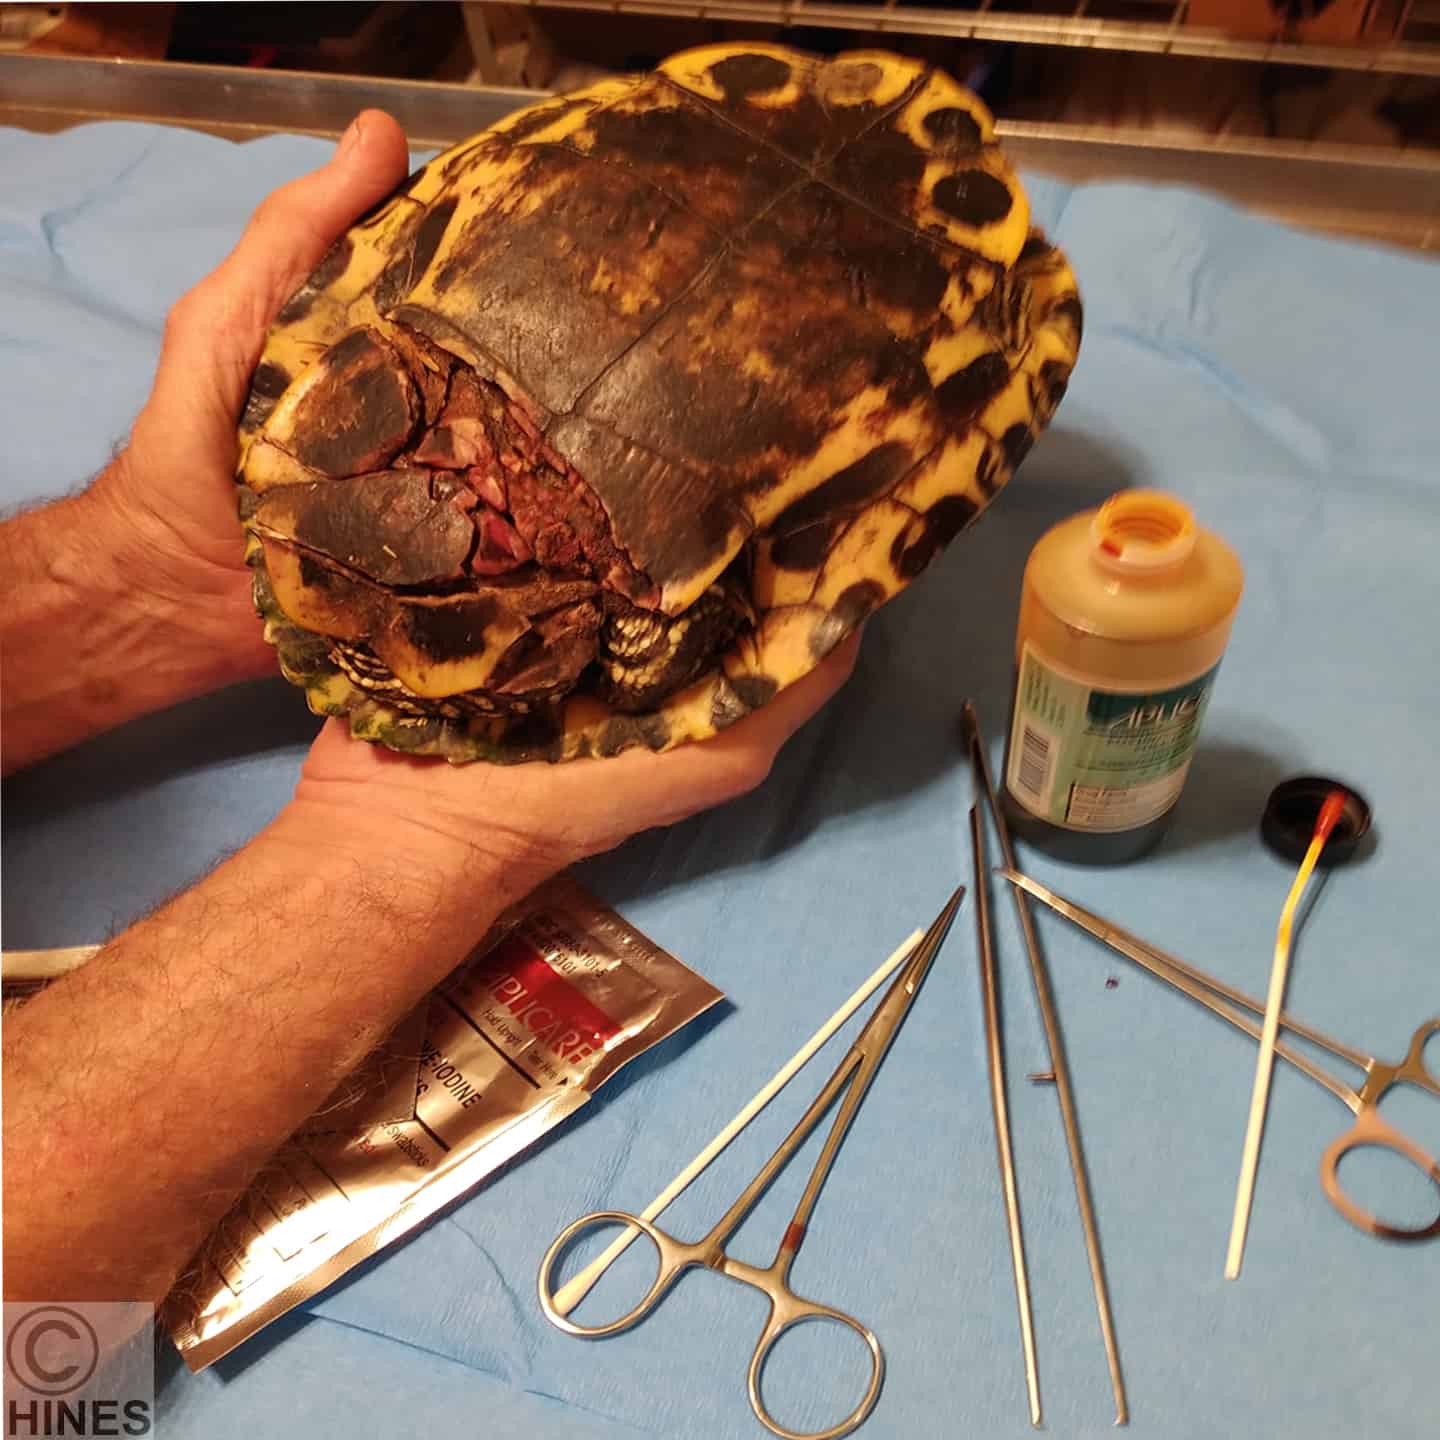
The red-eared slider above was picked up along a road in McAllen, Texas. The lady who brought it was beside herself because it had dropped from her hands and she thought that that was what cracked its plastron (bottom shell). I assured her that the accident occurred many days, probably weeks earlier. There were three large fragments and uncountable smaller ones. But by the time it was brought to me all were in the process of scaring in their current positions and impossible to fully slide into their original positions. If it was the turtle’s top shell, I would probably just treated it with daily applications of honey and waited for the very slow process of healing to occur. Honey is bactericidal and prevents fly maggots from bowing the wounds.
The Tools
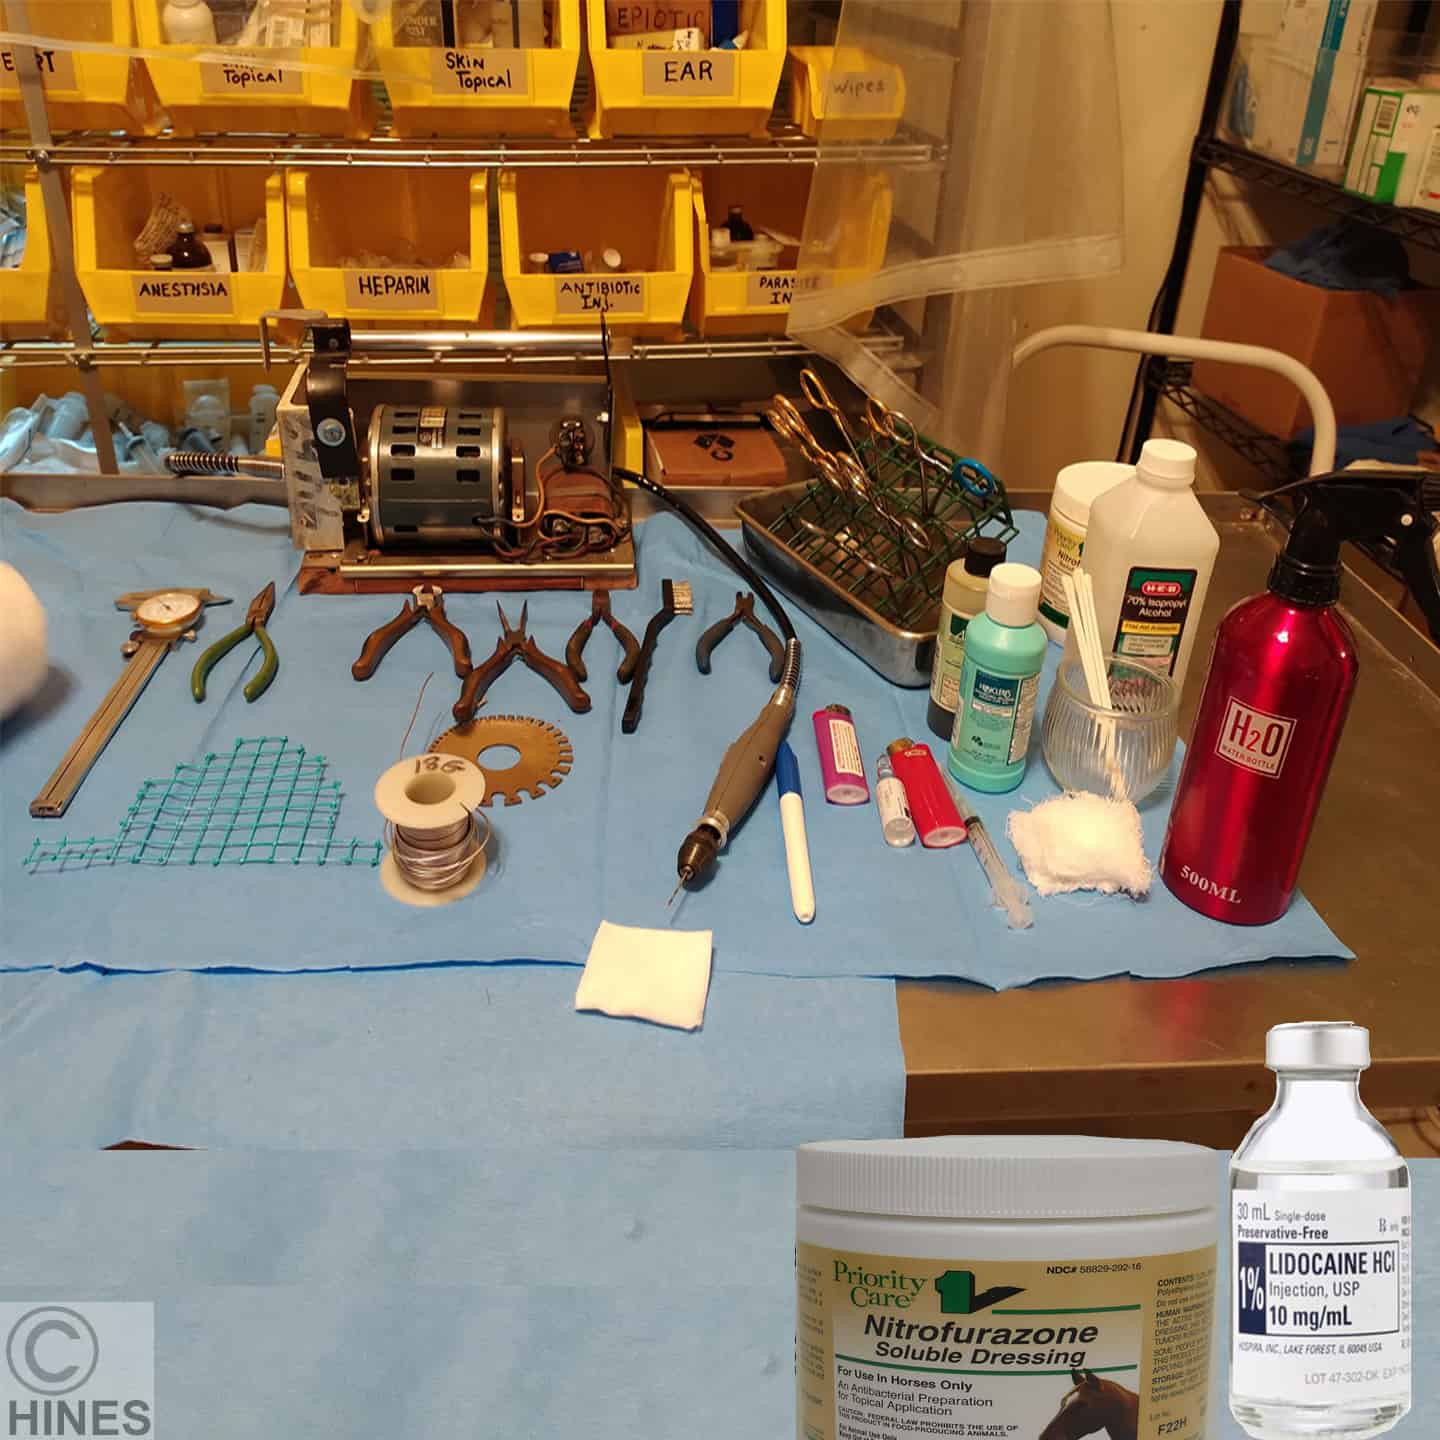

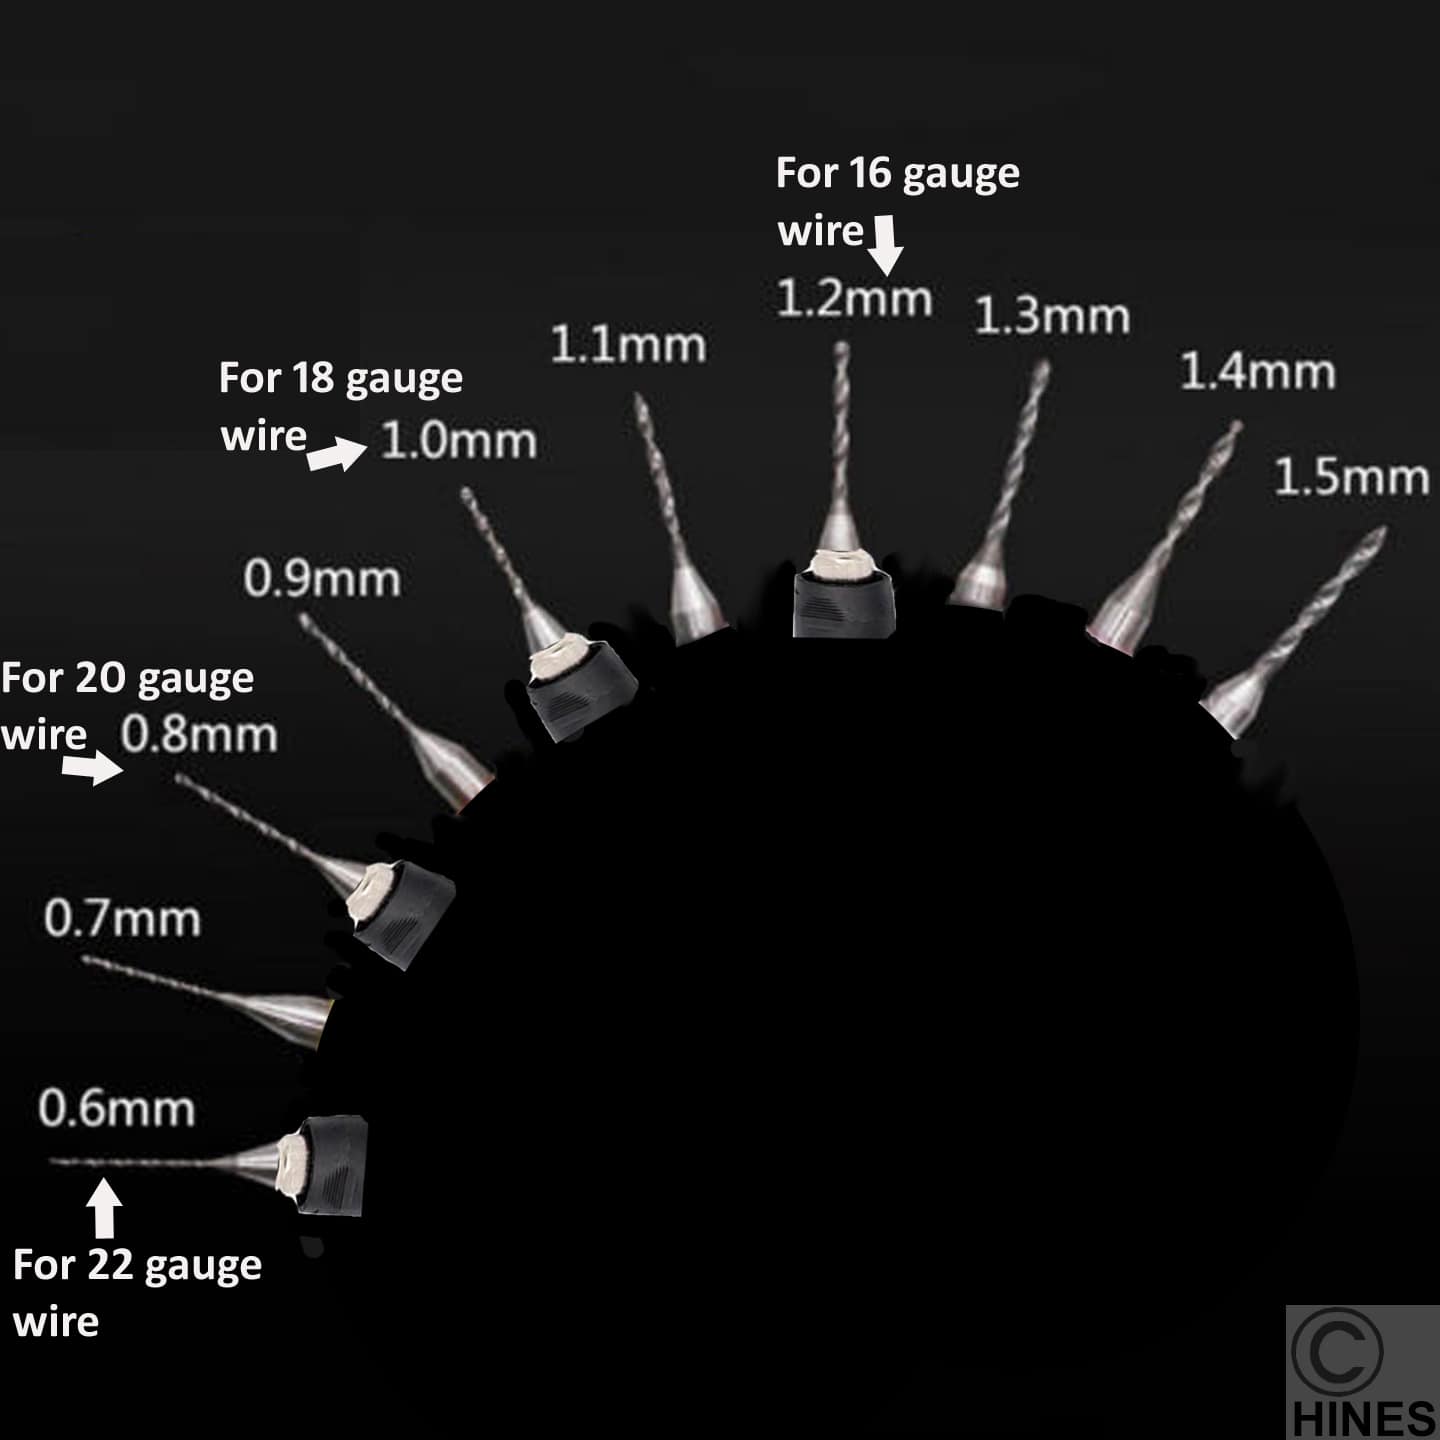
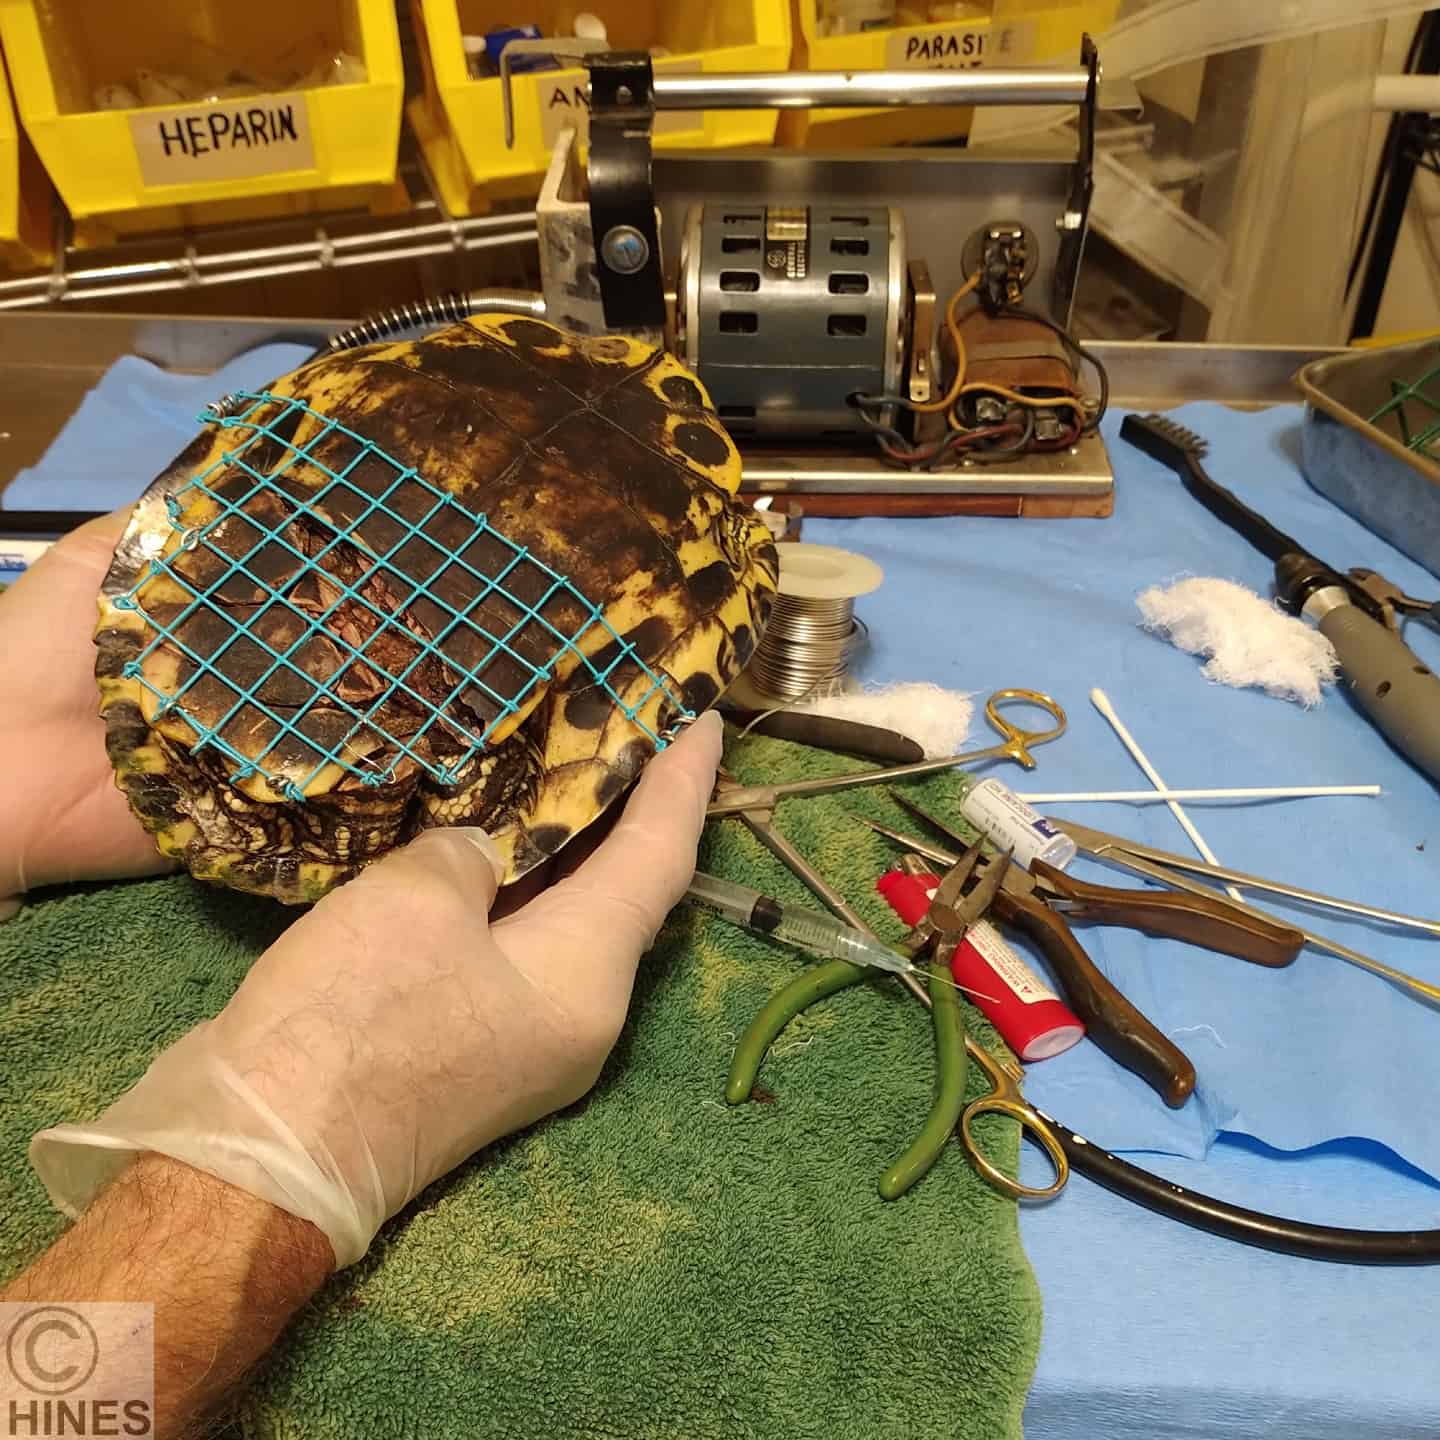
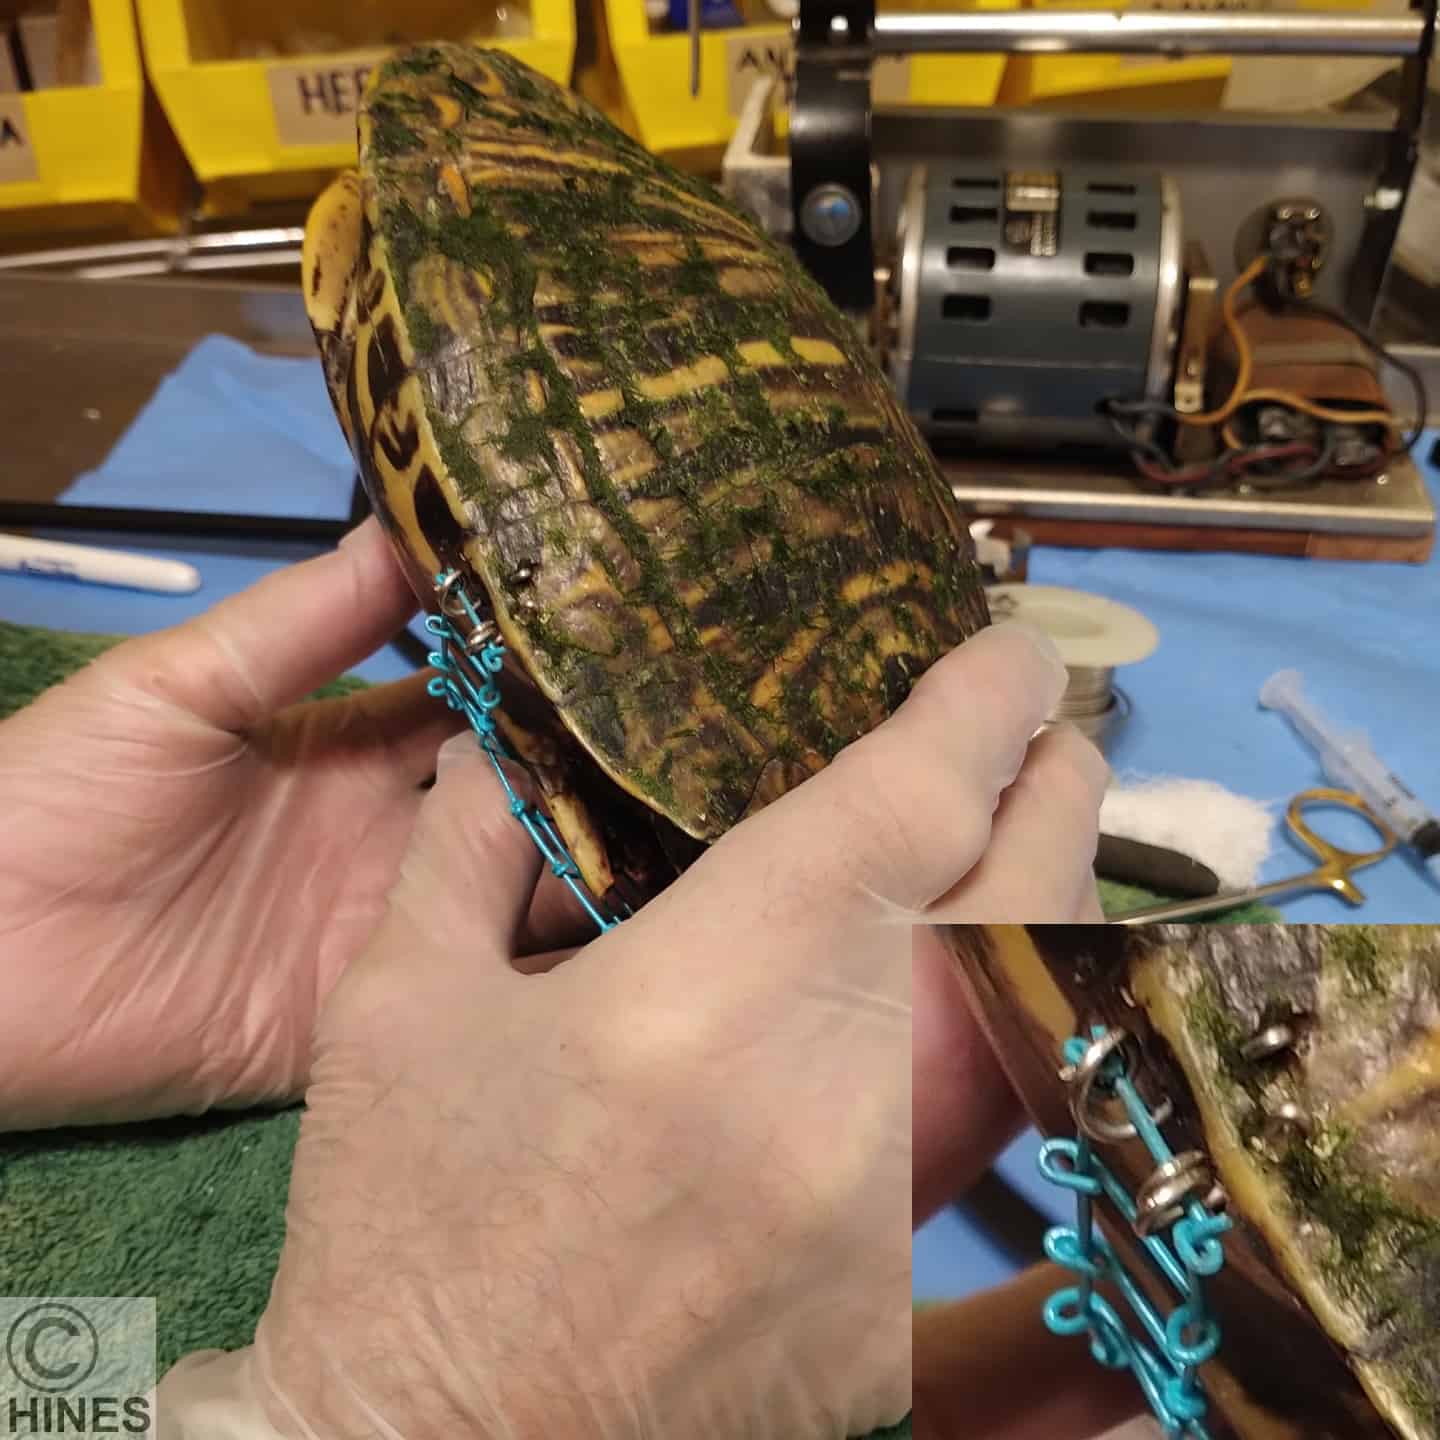
Cerclage wire and fine instrument repair tools work well to immobilize shell fragments in their proper position until they heal. This medical grade wire is sold in spools. Unlike lower grade stainless steel. This orthopedic wire is rust/corrosion proof and thought to be entirely inert. It is not attracted to magnets as cheaper grades of stainless-steel wire is. I purchase tiny drill bits of the same diameter as the wire. You can see a flexible shaft drill in the first photo, but a simple utility drill also works well. I look for anchoring points on the outer edge of the shell to drill holes and establish anchor points. Points that do not interfere with the animal’s walking and swimming ability. Drilling your pilot holes there, eliminates the danger of actually harming the turtle’s organs.
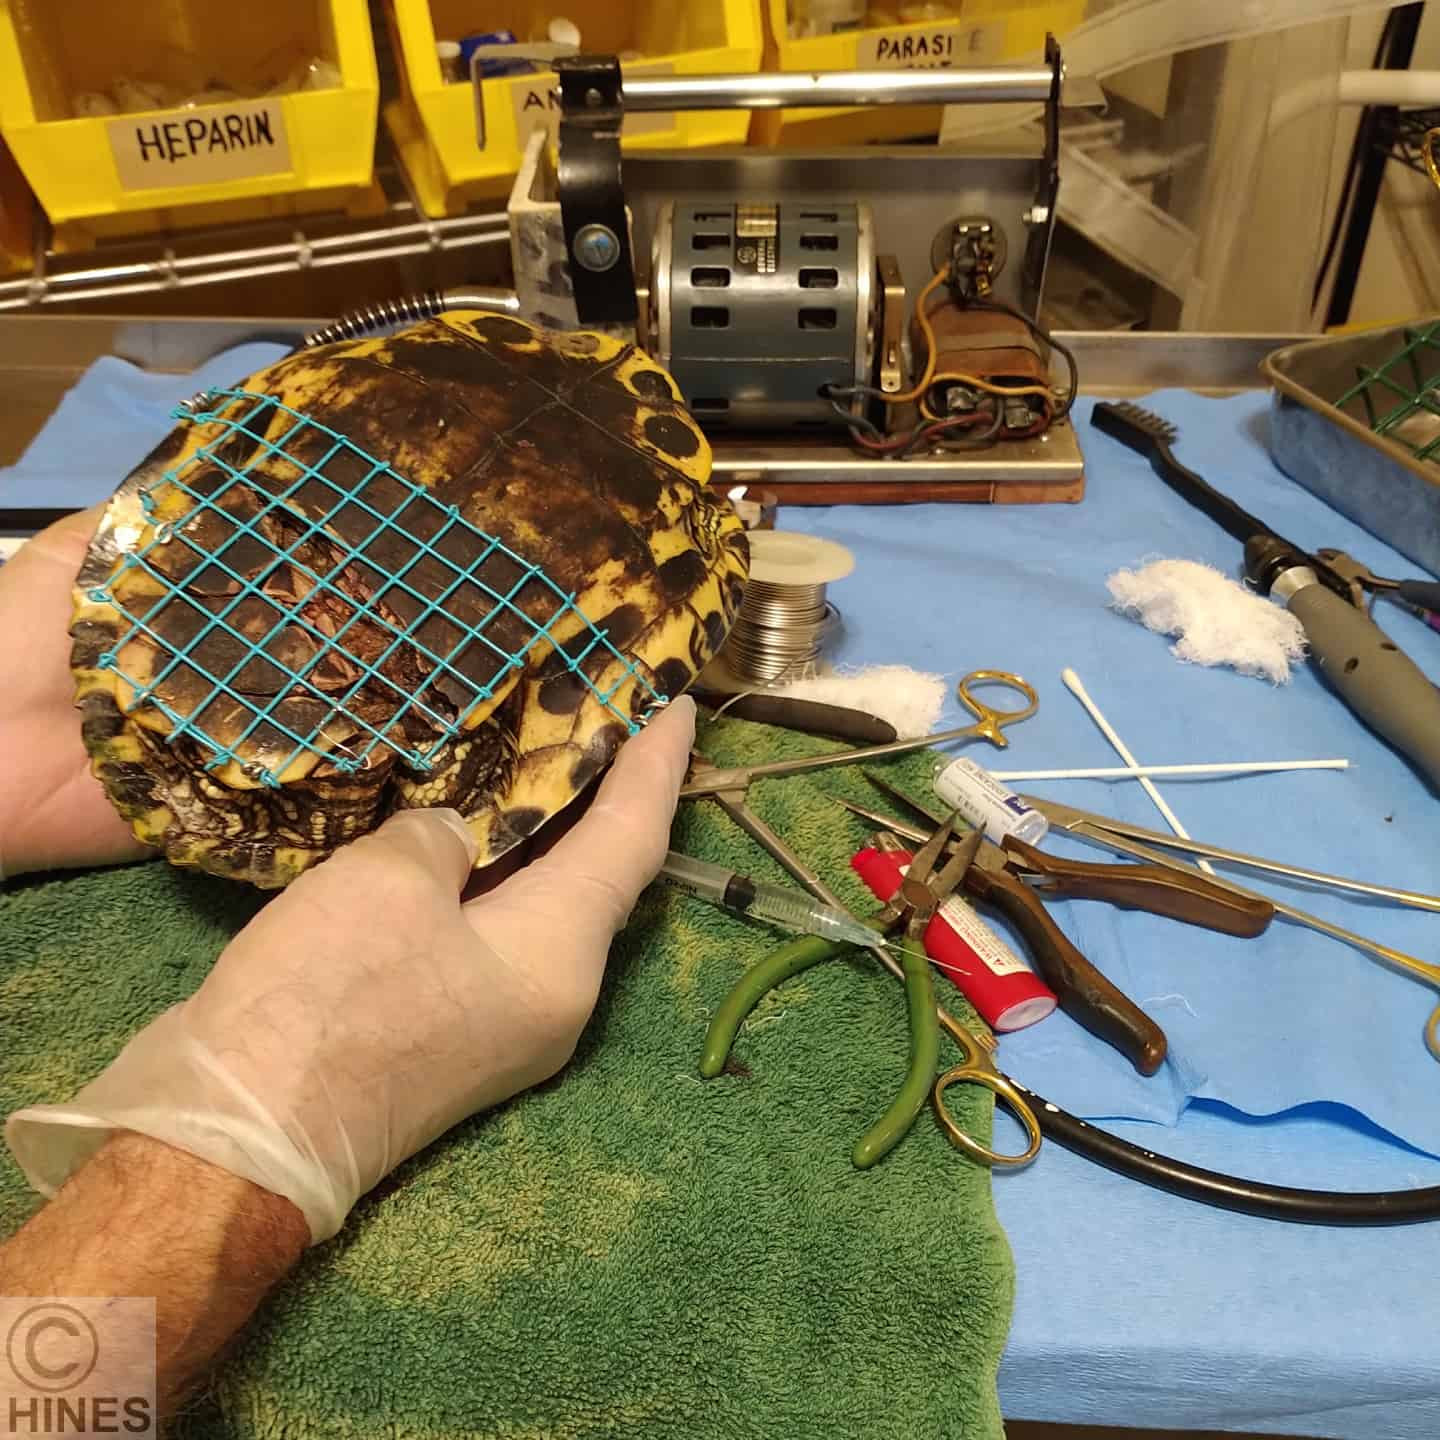
There were not enough safe drill points on this turtle to adequately anchor the many fragments in proper position. So, I made a paper template of the area in need of support that would reach safe shell edge fastening point and cut a section of 1/2″ x 1/2″ coated steel wire mesh to match that. Needle nose pliers allow one to bend over all sharp wires
What About Pain?
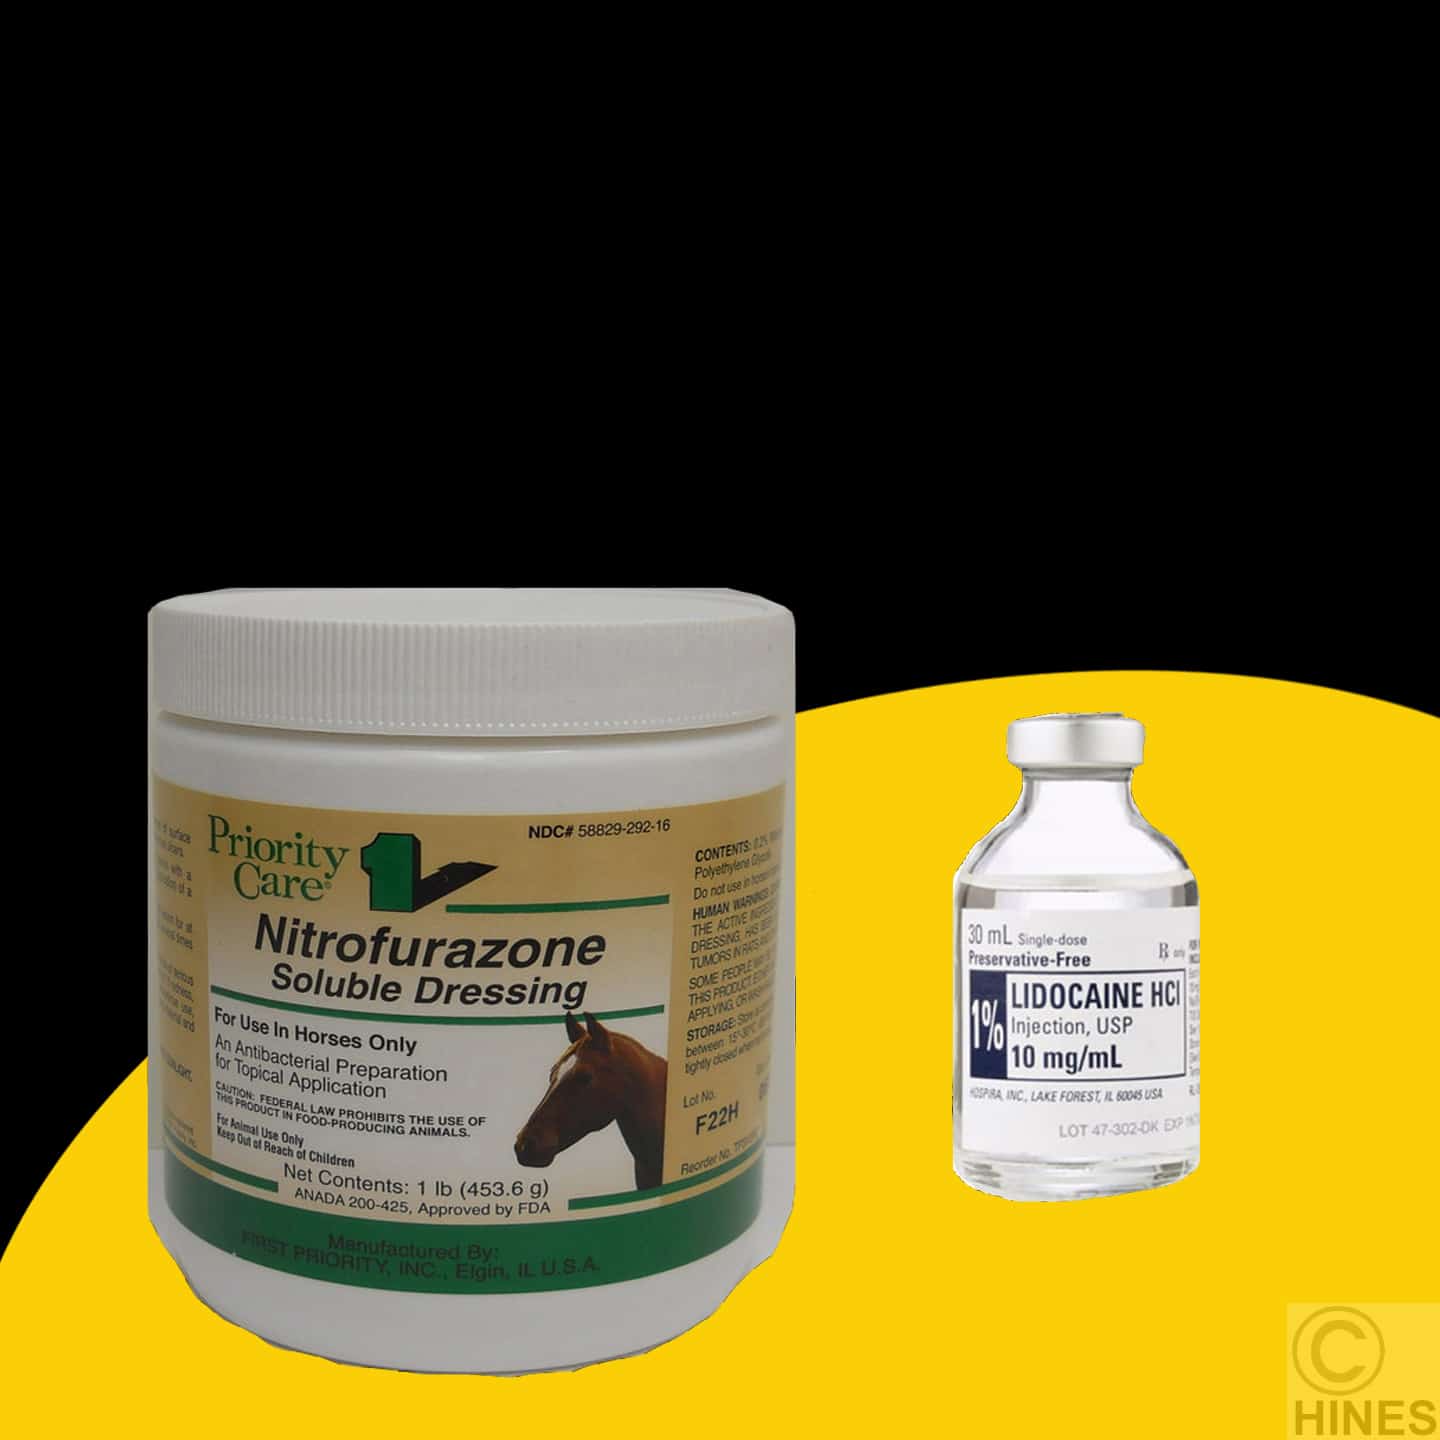
I have given these turtles and tortoises injections of ketamine, an anesthetic. I have given the isoflurane gas to inhale. But depth of anesthesia and sensitivity to pain is very hard to judge in reptiles. So, now I often rely on injectable lidocaine 1%, 2% never with epinephrine when repairing their shells. Once I have drilled a slight indentation into the shell, I drip 1% lidocaine on the area. I see no indicating that that bothers turtles or tortoises. As the drill moves deeper, I alternate that with a dab of nitrofurazone cream, primarily to keep the drill bit cool.
What About Becoming Dehydrated While Out Of The Water?
As long as a turtle is in and aquarium or tub with the water level covering its tail. It should not become dehydrated since turtles can absorb water through its rectum. But in this turtle’s case, I kept it in a vat lined with a wet doorstep floor mat, misting it with water several times a day during its first week with me. Turtles kept out of water are said to become seriously dehydrated after 4–7 days. It wasn’t until the second week that I submersed it tail deep in water periodically and misted it with water on the days that I didn’t.
What About Heavy Green Algae On Its Shell?
The turtle had come in with a lush growth of green algae. I believe it is one called Arnoldiella chelonum. It is close to impossible to remove with a brush or tweezers, being very tough and anchored between the scutes. Most folks consider moderate amounts of this algae to be harmless, but others believe that it encourages shell rot since its “roots” are invasive. Read here: 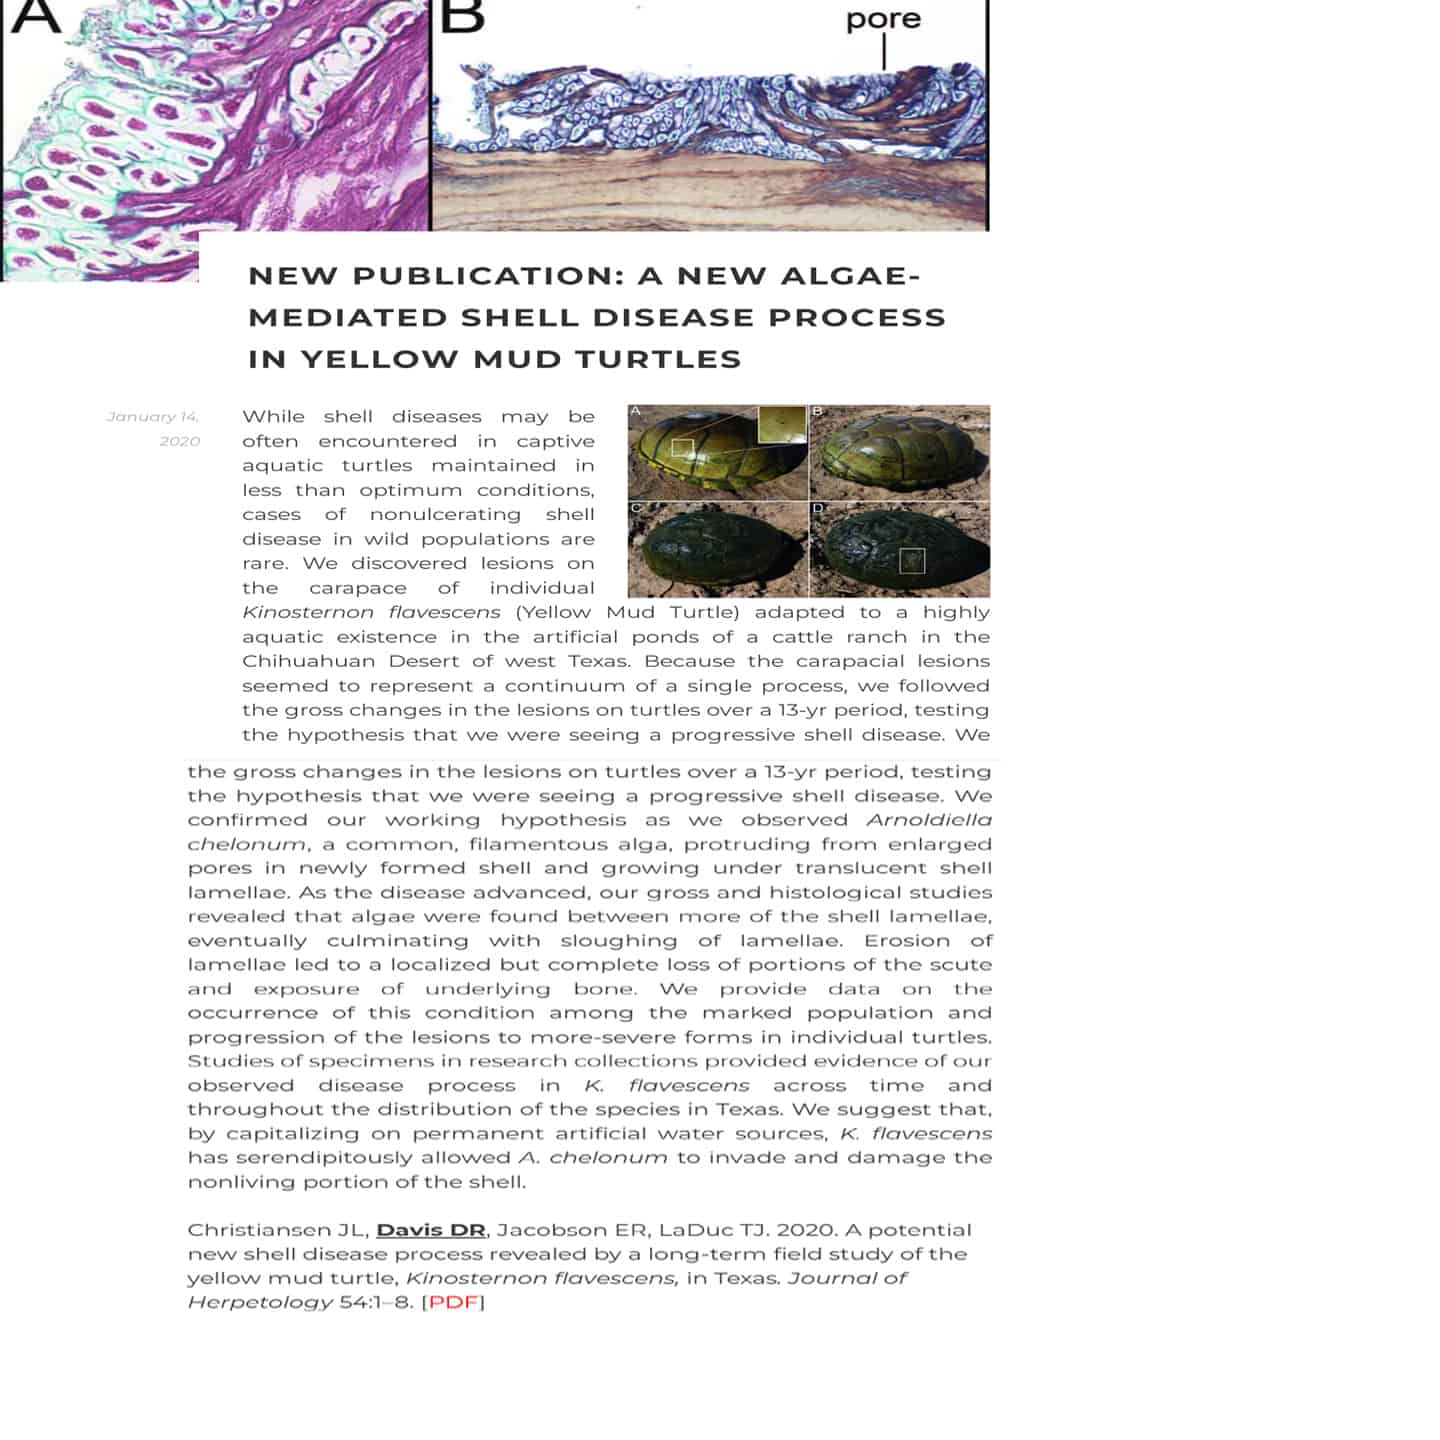 During the time it has been living in water only deep enough to cover its tail, the algae has completely disappeared from sight. That is probably the best way to rid these turtles of this pesky stuff. However, it may bloom again once this turtle returns to a more normal life. I do not know.
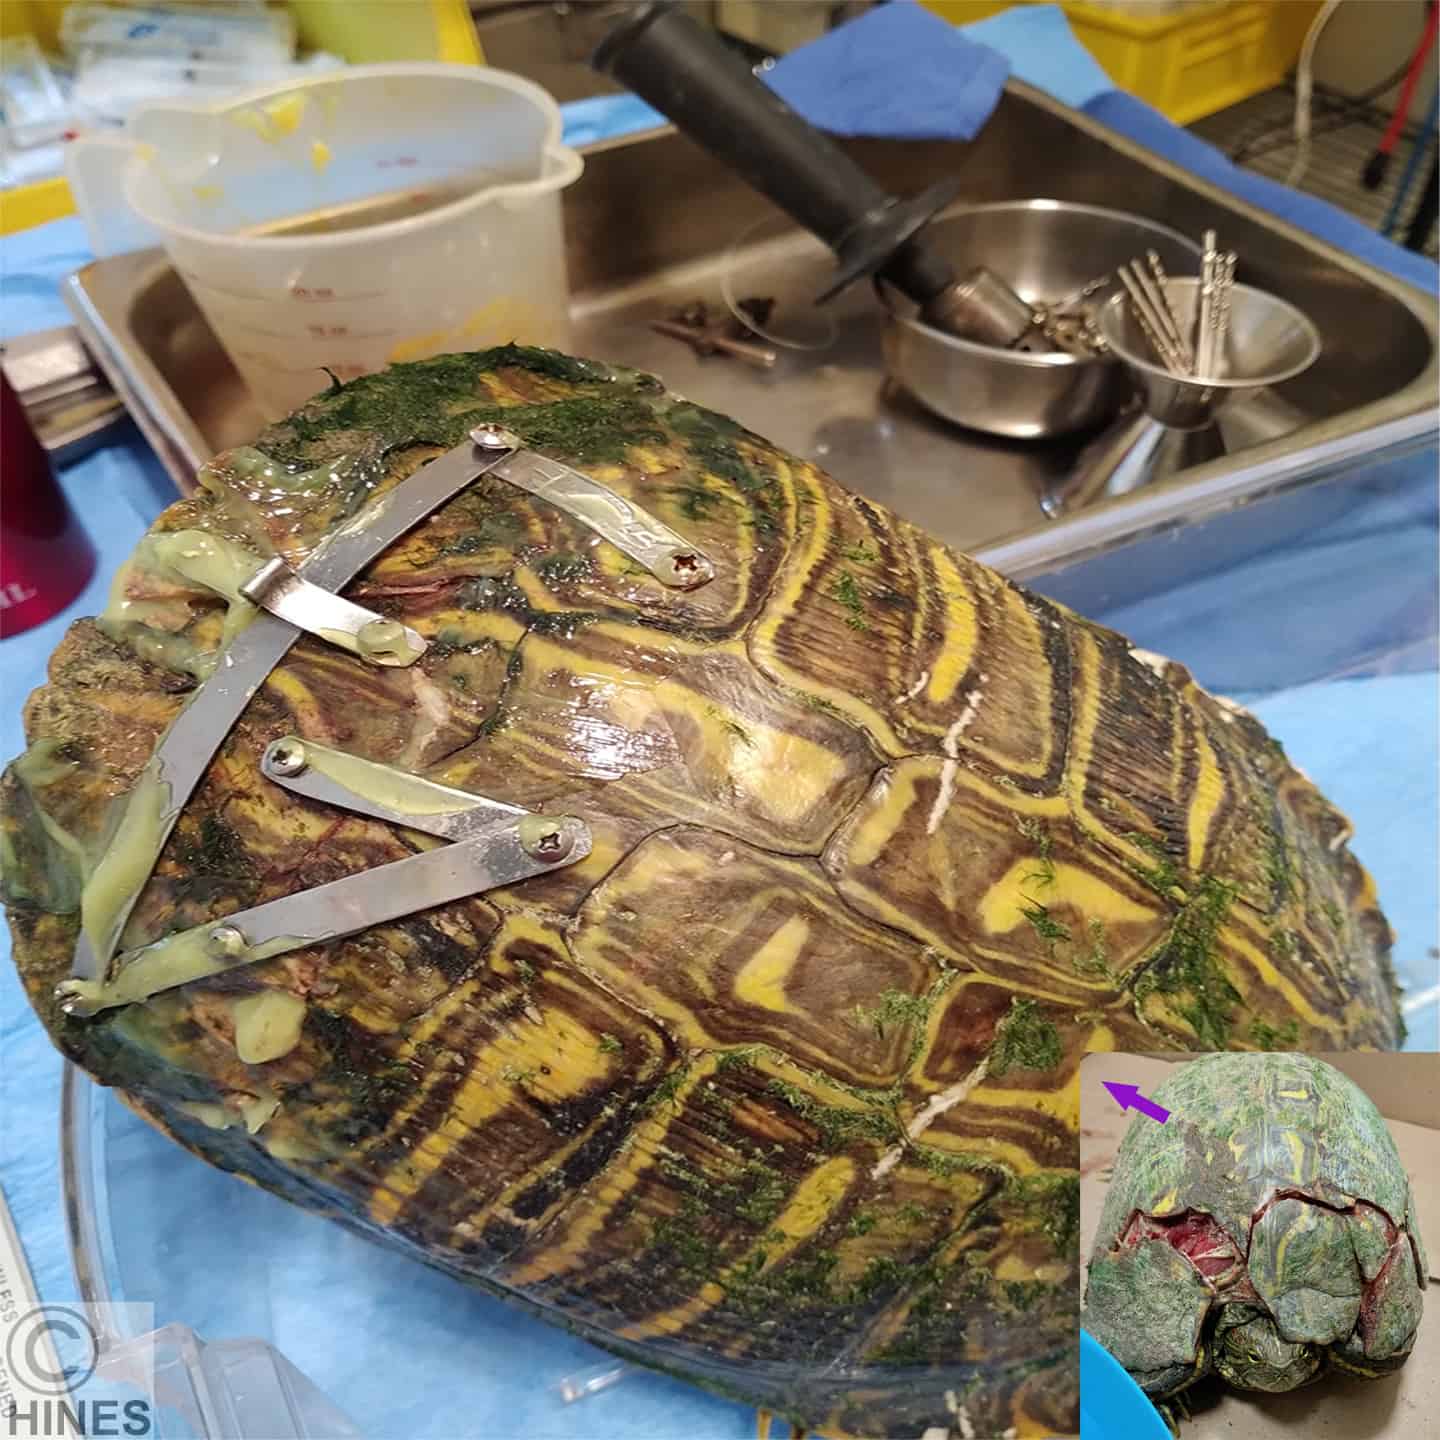
Orthopedic Plating
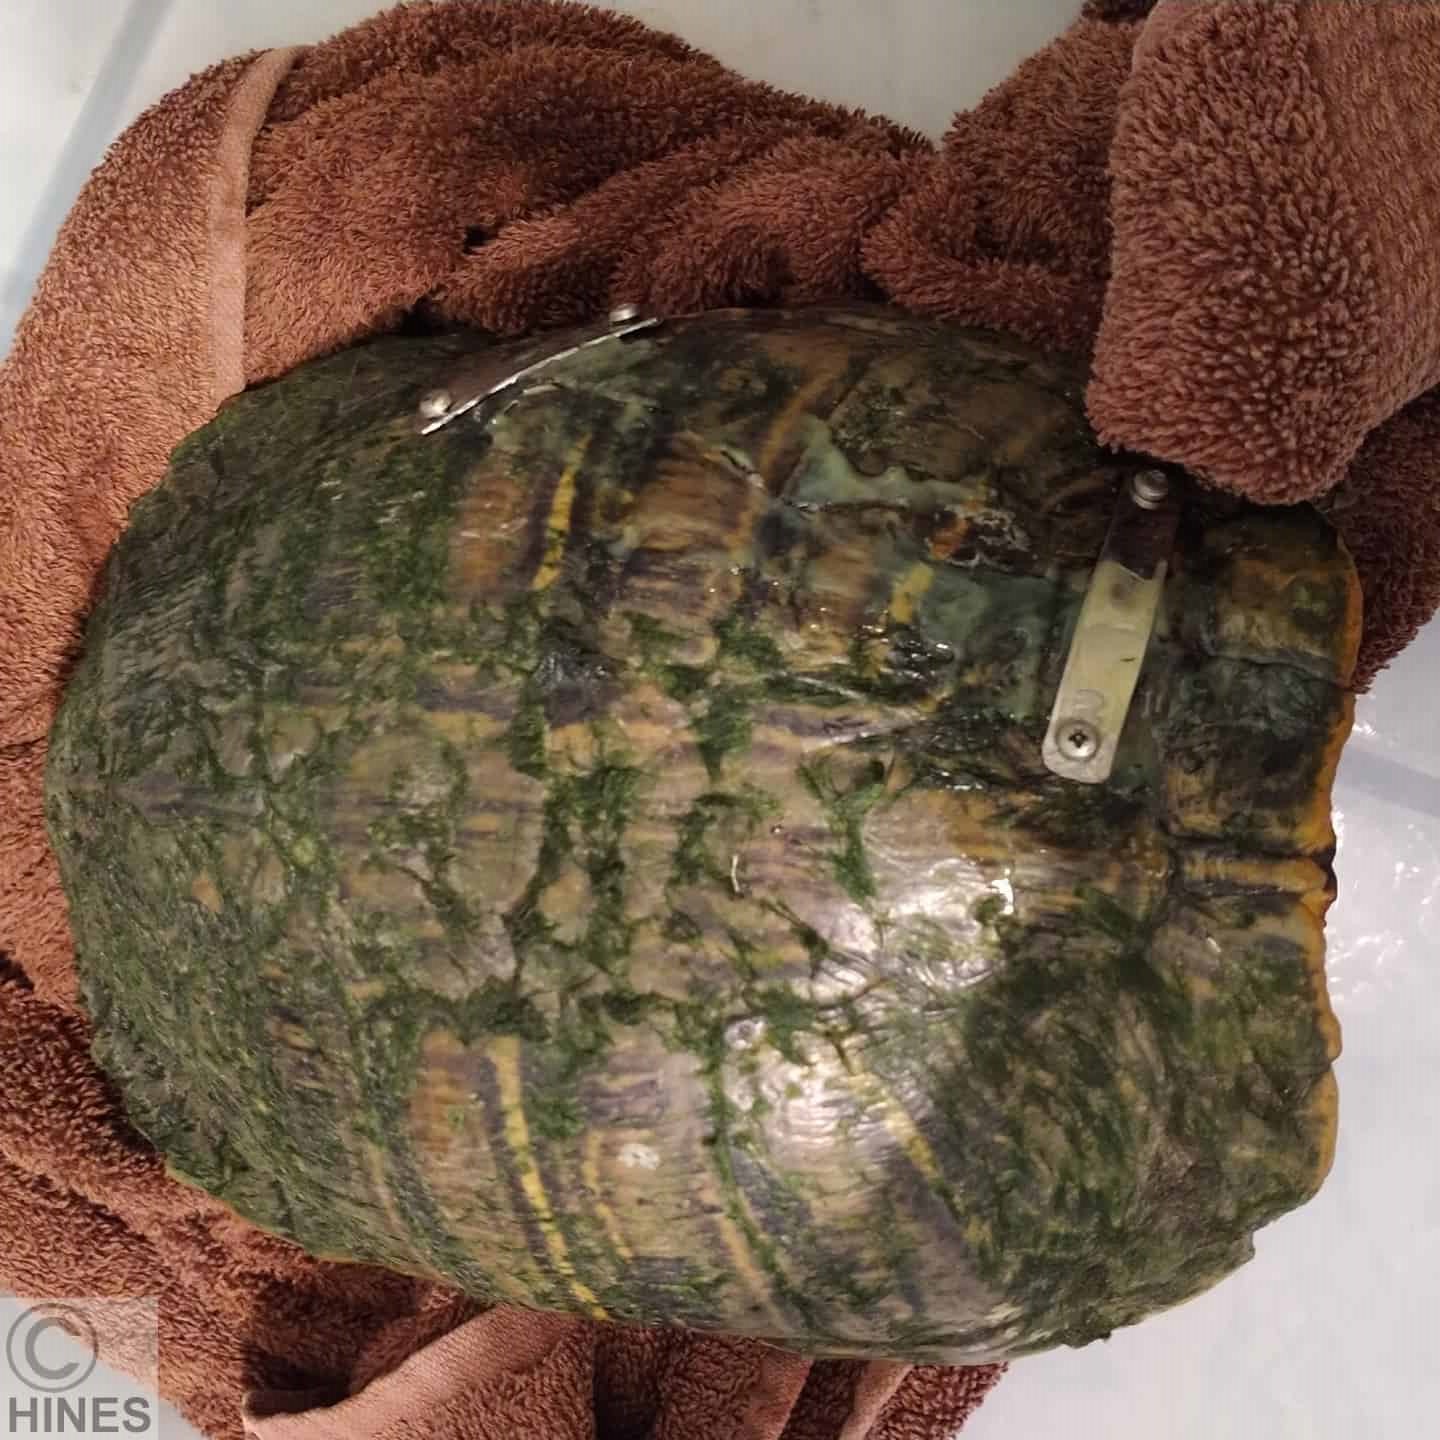
The slider turtle above arrived with two major carapace cracks. They hadn’t shifted much in location or developed into wide cracks, but they couldn’t be wired together without entering the body cavity. Never a good idea. When cracked turtles arrive and there are no safe locations to anchor wires, one needs other options. Small animal orthopedic plates and bone screws can be purchased. See here: 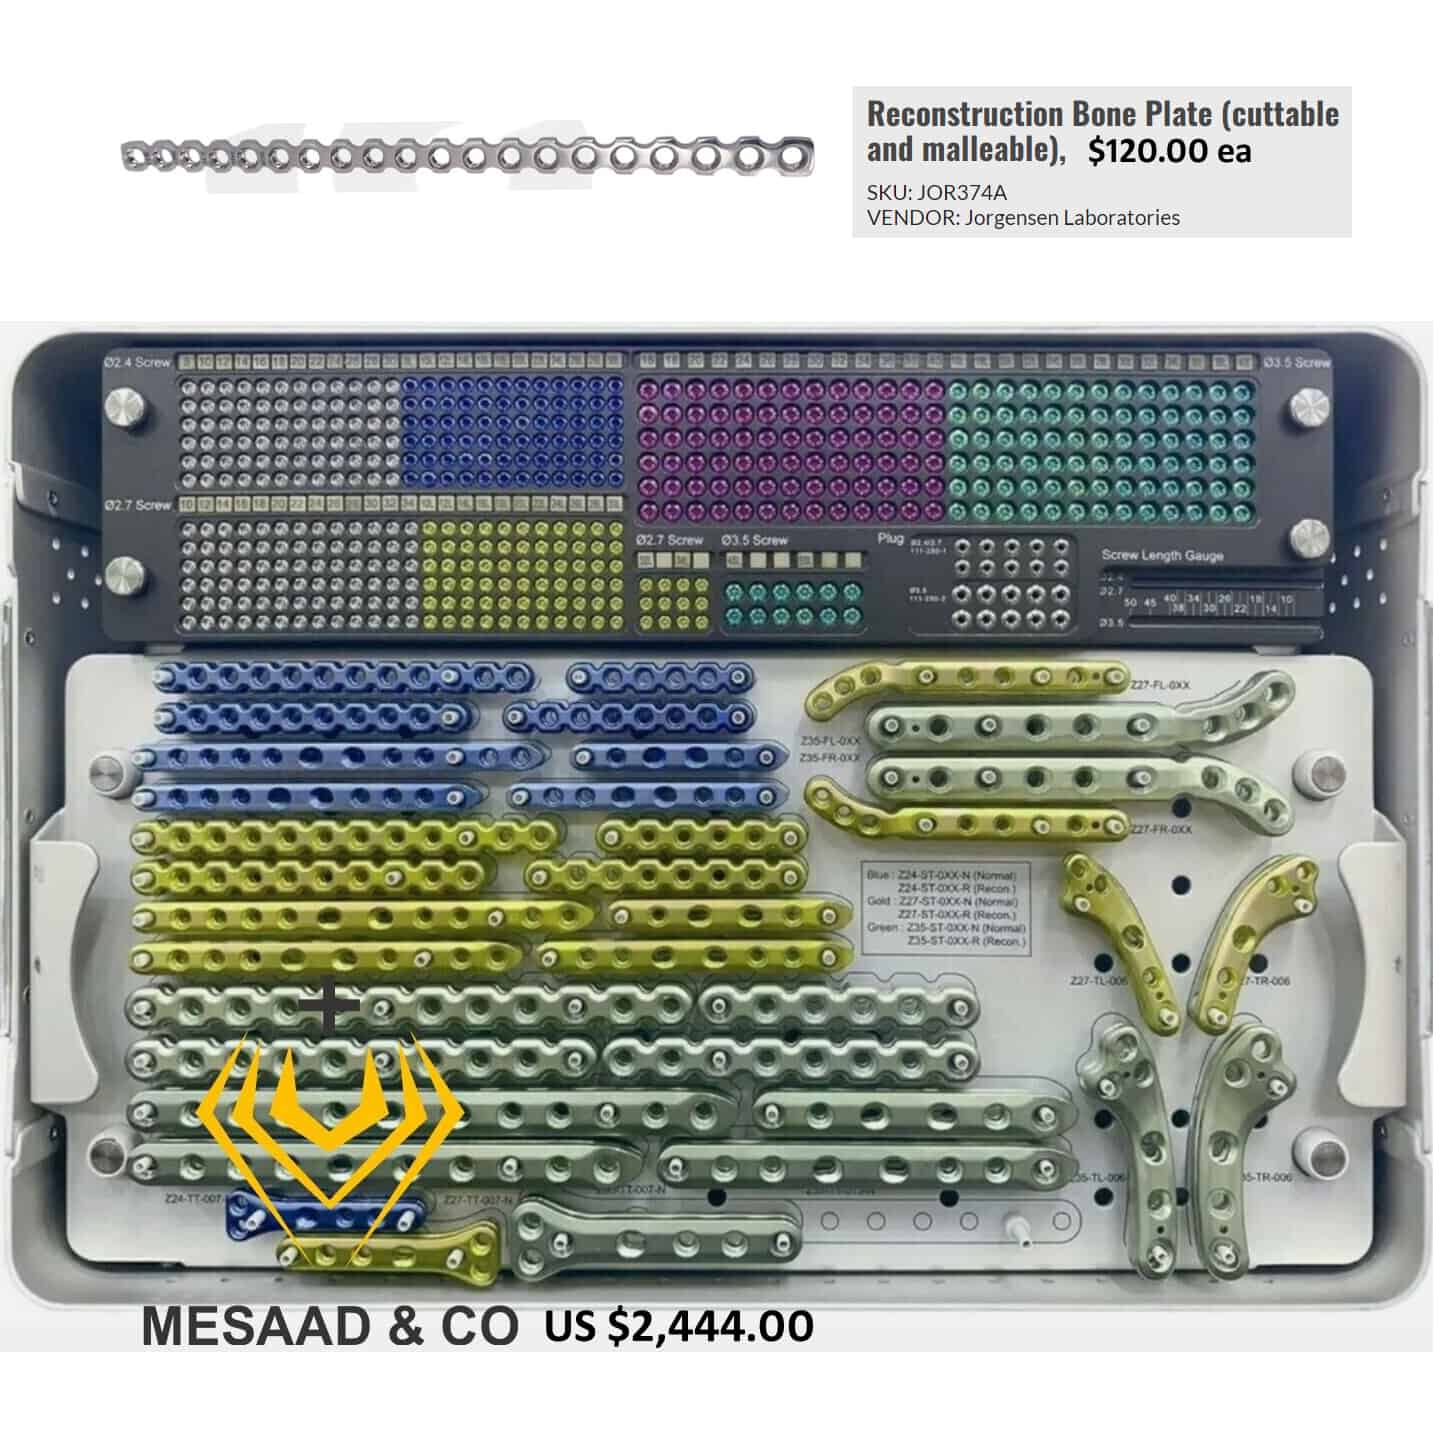 But my meager budget does not allow that. Orthopedic plates and screws are made from the most expensive high-chromium grades of non-magnetic stainless steel. Because of their corrosion resistance, they can be left in the body indefinitely. There are over 150 grades of stainless steel. For what you will be doing, you don’t need that. Although magnetic and not nearly as corrosion resistant, much cheaper appliance grade #304 or #403 stainless steel will do just fine. Something you can salvage from an old refrigerator door or dishwasher. The one I salvaged and still cut from is a section of that is 0.028 inches thick. That’s the same as 0.7112 mm, also the same as 23 gauge. You can also purchase tiny pan head stainless Phillips screws on eBay. The ones I purchase are #0 x 7/16” length x 25 count @ $9.26 #1 x 3/16” length x 25 count @ $8.94 #2 x ½” length 100 count @ $6.28 and #4 x ½” length x 100 @6.48
I cut an appropriately sized portion from that plate with metal shears whenever I need them. I smooth the edges on a fine grit grinder and rub them even smoother with 800 grit automotive sand paper. Then I drill a 1/8″ hole at one end with a drill press, take it back and mark the appropriate location for the hole on the opposite end with an indelible marker, take it back to the shop and drill that hole. One must be very careful when drilling holes in a turtle’s carapace so as not to penetrate inside its body cavity. That requires low pressure on the drill and a toothpick or bright wood stick to gage the depth as you go along. If the screws are a bit too long, I back them out, grind or clip off the pointed end and then replace them.
The Really Tragic Cases
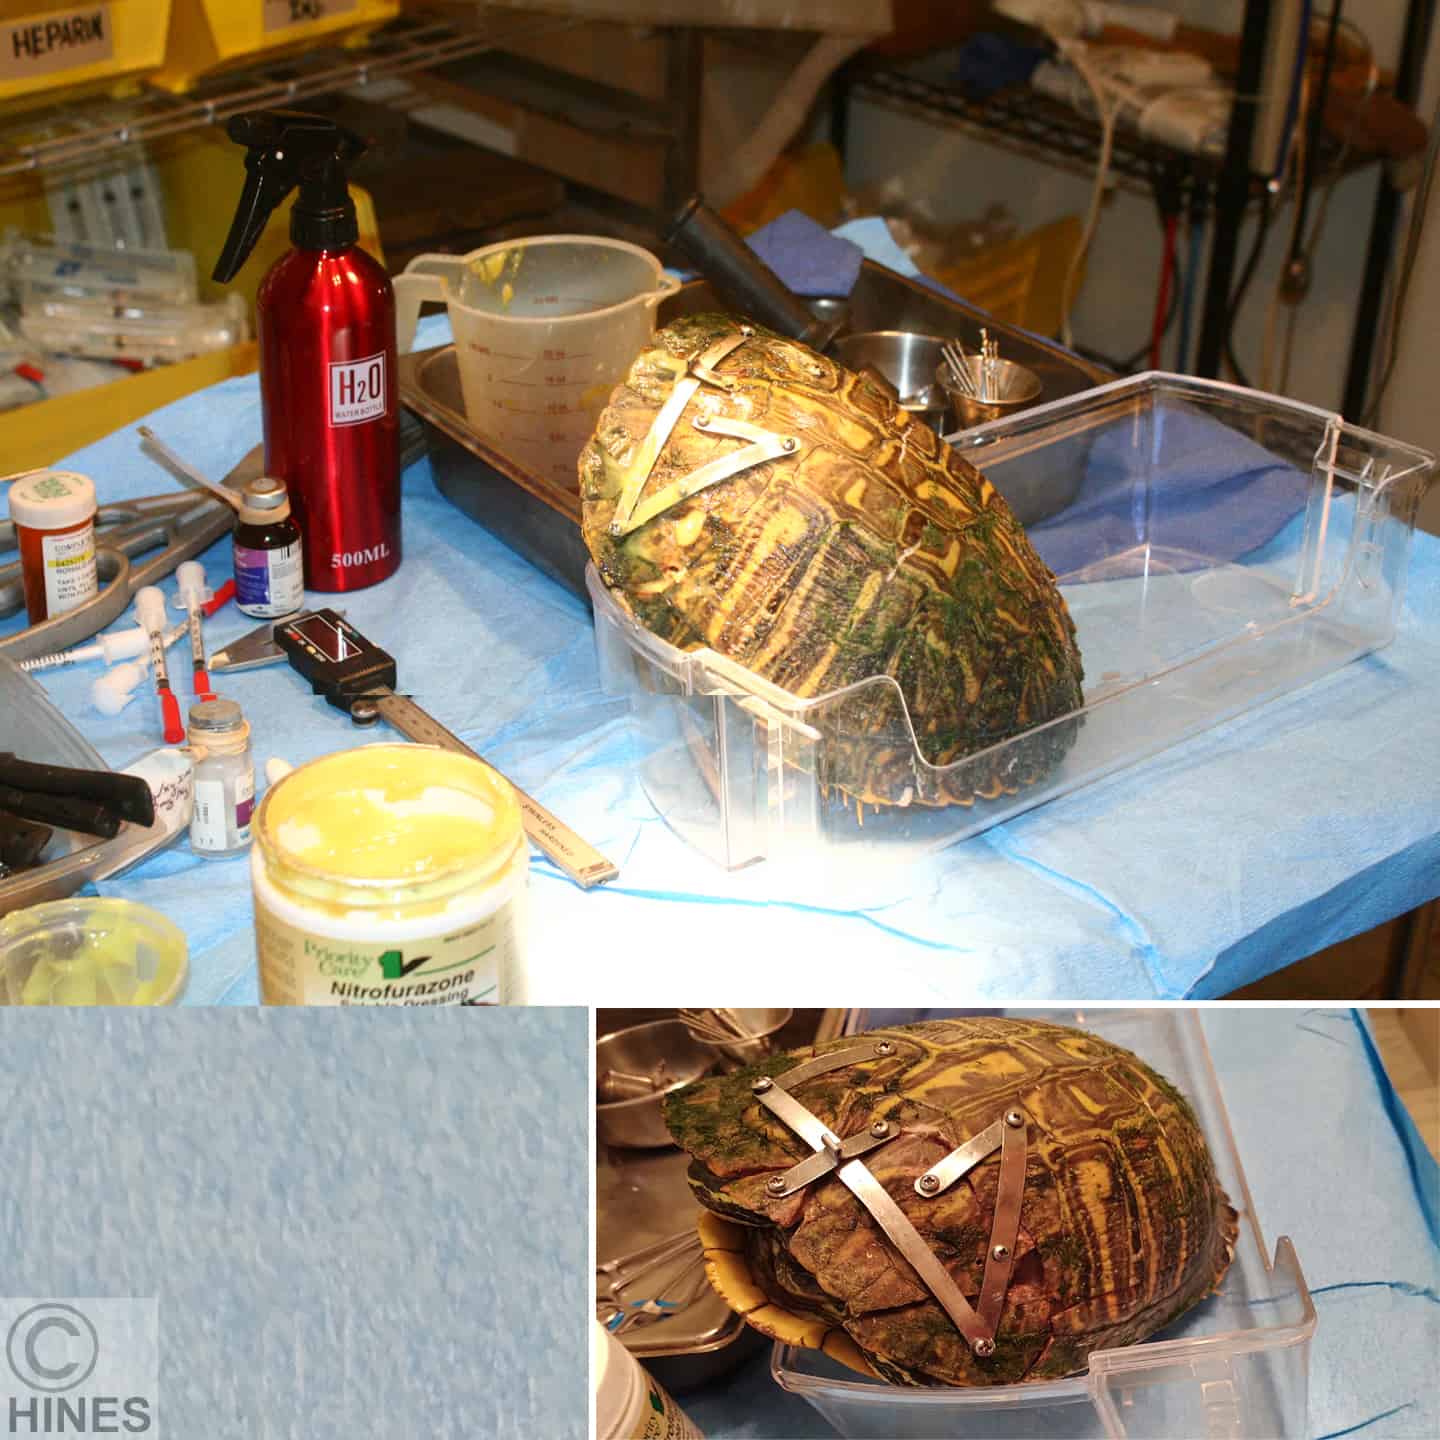

Over the years, it becomes harder and harder for me to euthanize animals. So, I sometimes attempt to help turtles that others would pass over. When I do, I use the same techniques. To position the shell fragments in as tight an alignment as possible, it is sometime more convenient to leave some space between large fragments, place the two screws, one in each portion then elevate the stainless-steel strip over the crack and pinch it together with needle nose pliers, or a large hemostat.
People Do The Silliest Things!
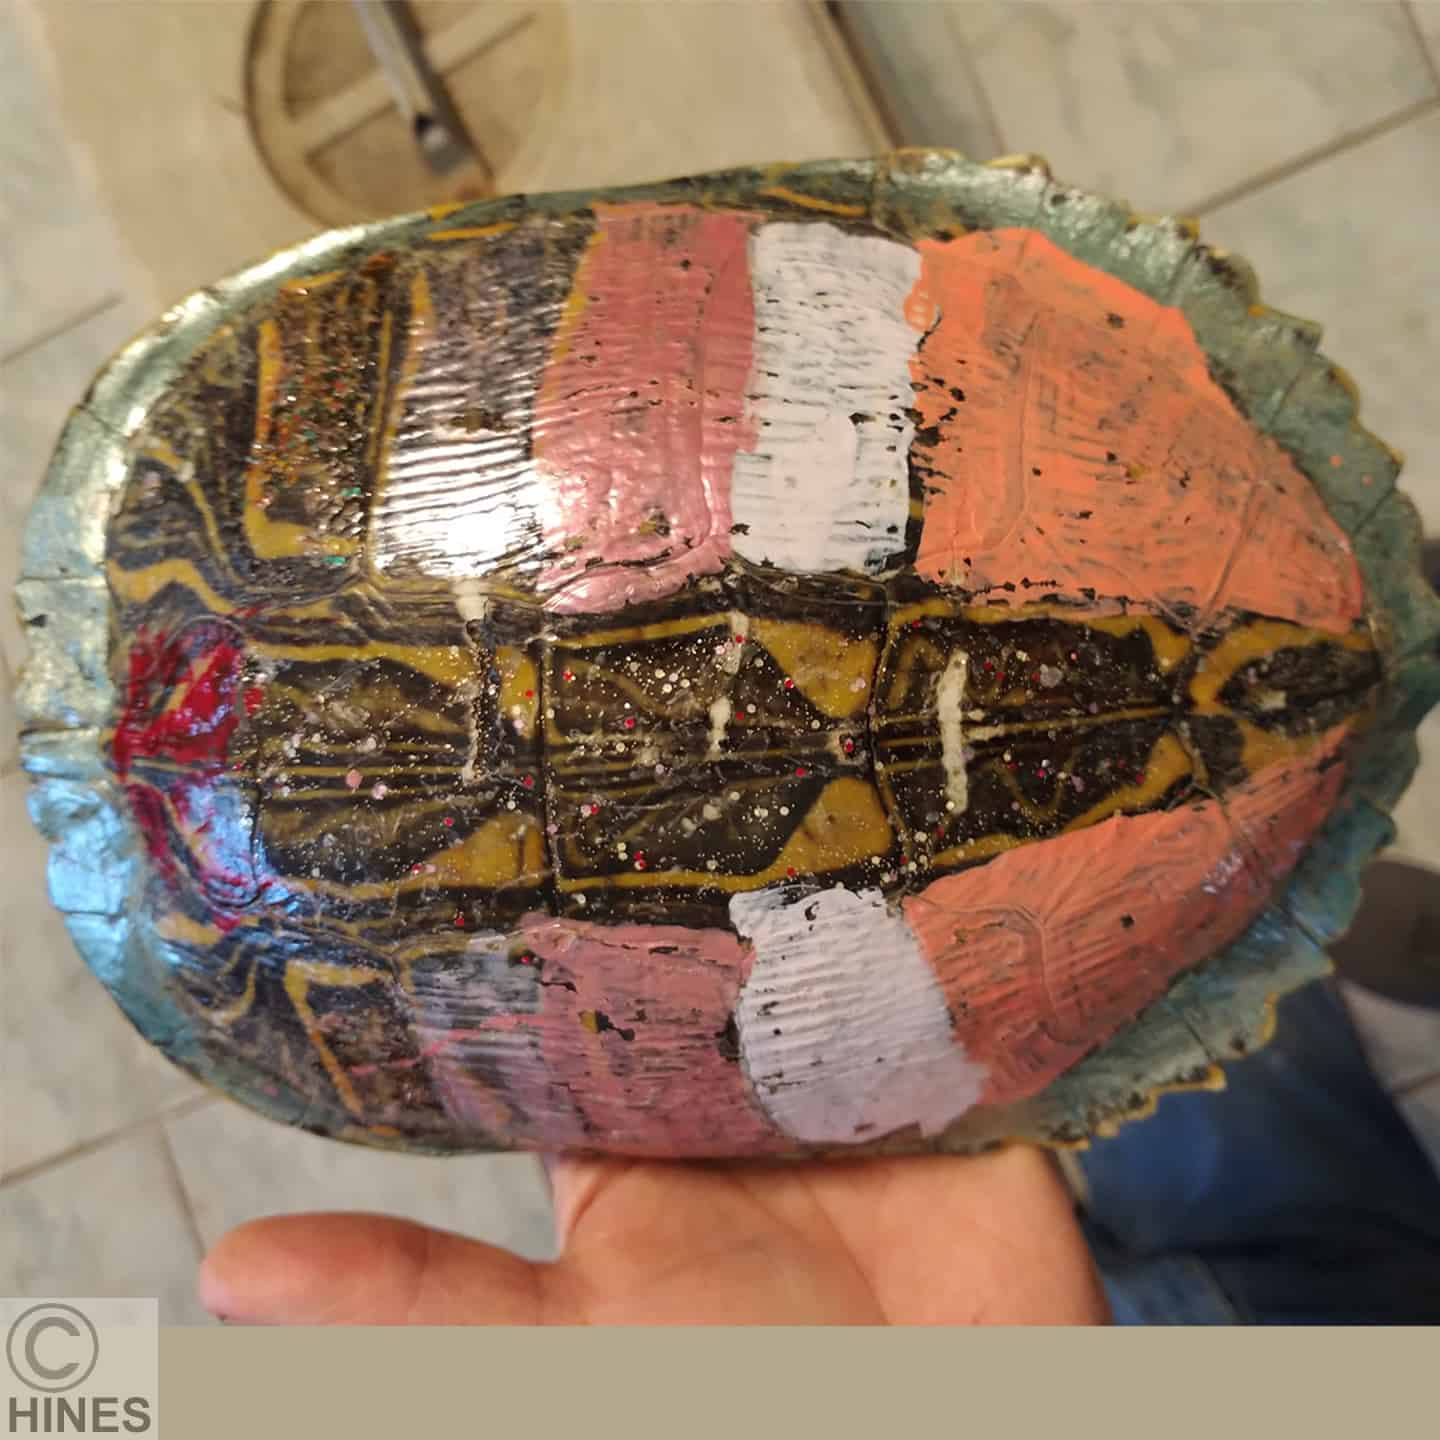
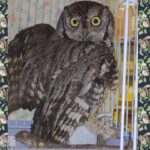
It took me a couple of hours with citrus oil to get this paint off. That product is also great for cleaning wildlife trapped on rodent glue pad traps such as this little screech owl. It is sold on the cosmetics isles of Wal-Mart
 Dear reader, Besides your donations, Visiting the products that Google chooses to display on this webpage helps me pay the cost of keeping this article on the Web. As you know, sites like mine that are not designed to make money are getting harder and harder to find. Best wishes, Ron Hines